Eat your (real) greens soup

Green Soup

Everywhere I look right now I read about re-alkanising my probably too acid body, super powders, acai, cleansing (is that a euphemism?), optimum ph, powdered greens to add to my wheatgrass juice etc etc.  Now I am not knocking anyone who might want to add any of the above to their daily diet but in all honesty isn’t it easier, cheaper and just more real to eat vegetables.  Surely these are better in their fresh, honest and original state than any dried, powdered, vitamin added supplement?

As you see from these pages I try to cook seasonally and from scratch whilst still retaining a little fun and indulgence, balance being the spice of life and all that.  I know I should probably eat more fruit and I definitely could do with more fish in my diet but generally I reckon we do ok.  If I were to present my family with a glass each of coconut water or almond milk and ask them to add a sachet of revitalising, re-balancing green powder to it, well what do you think they would say?  I have a rough idea.

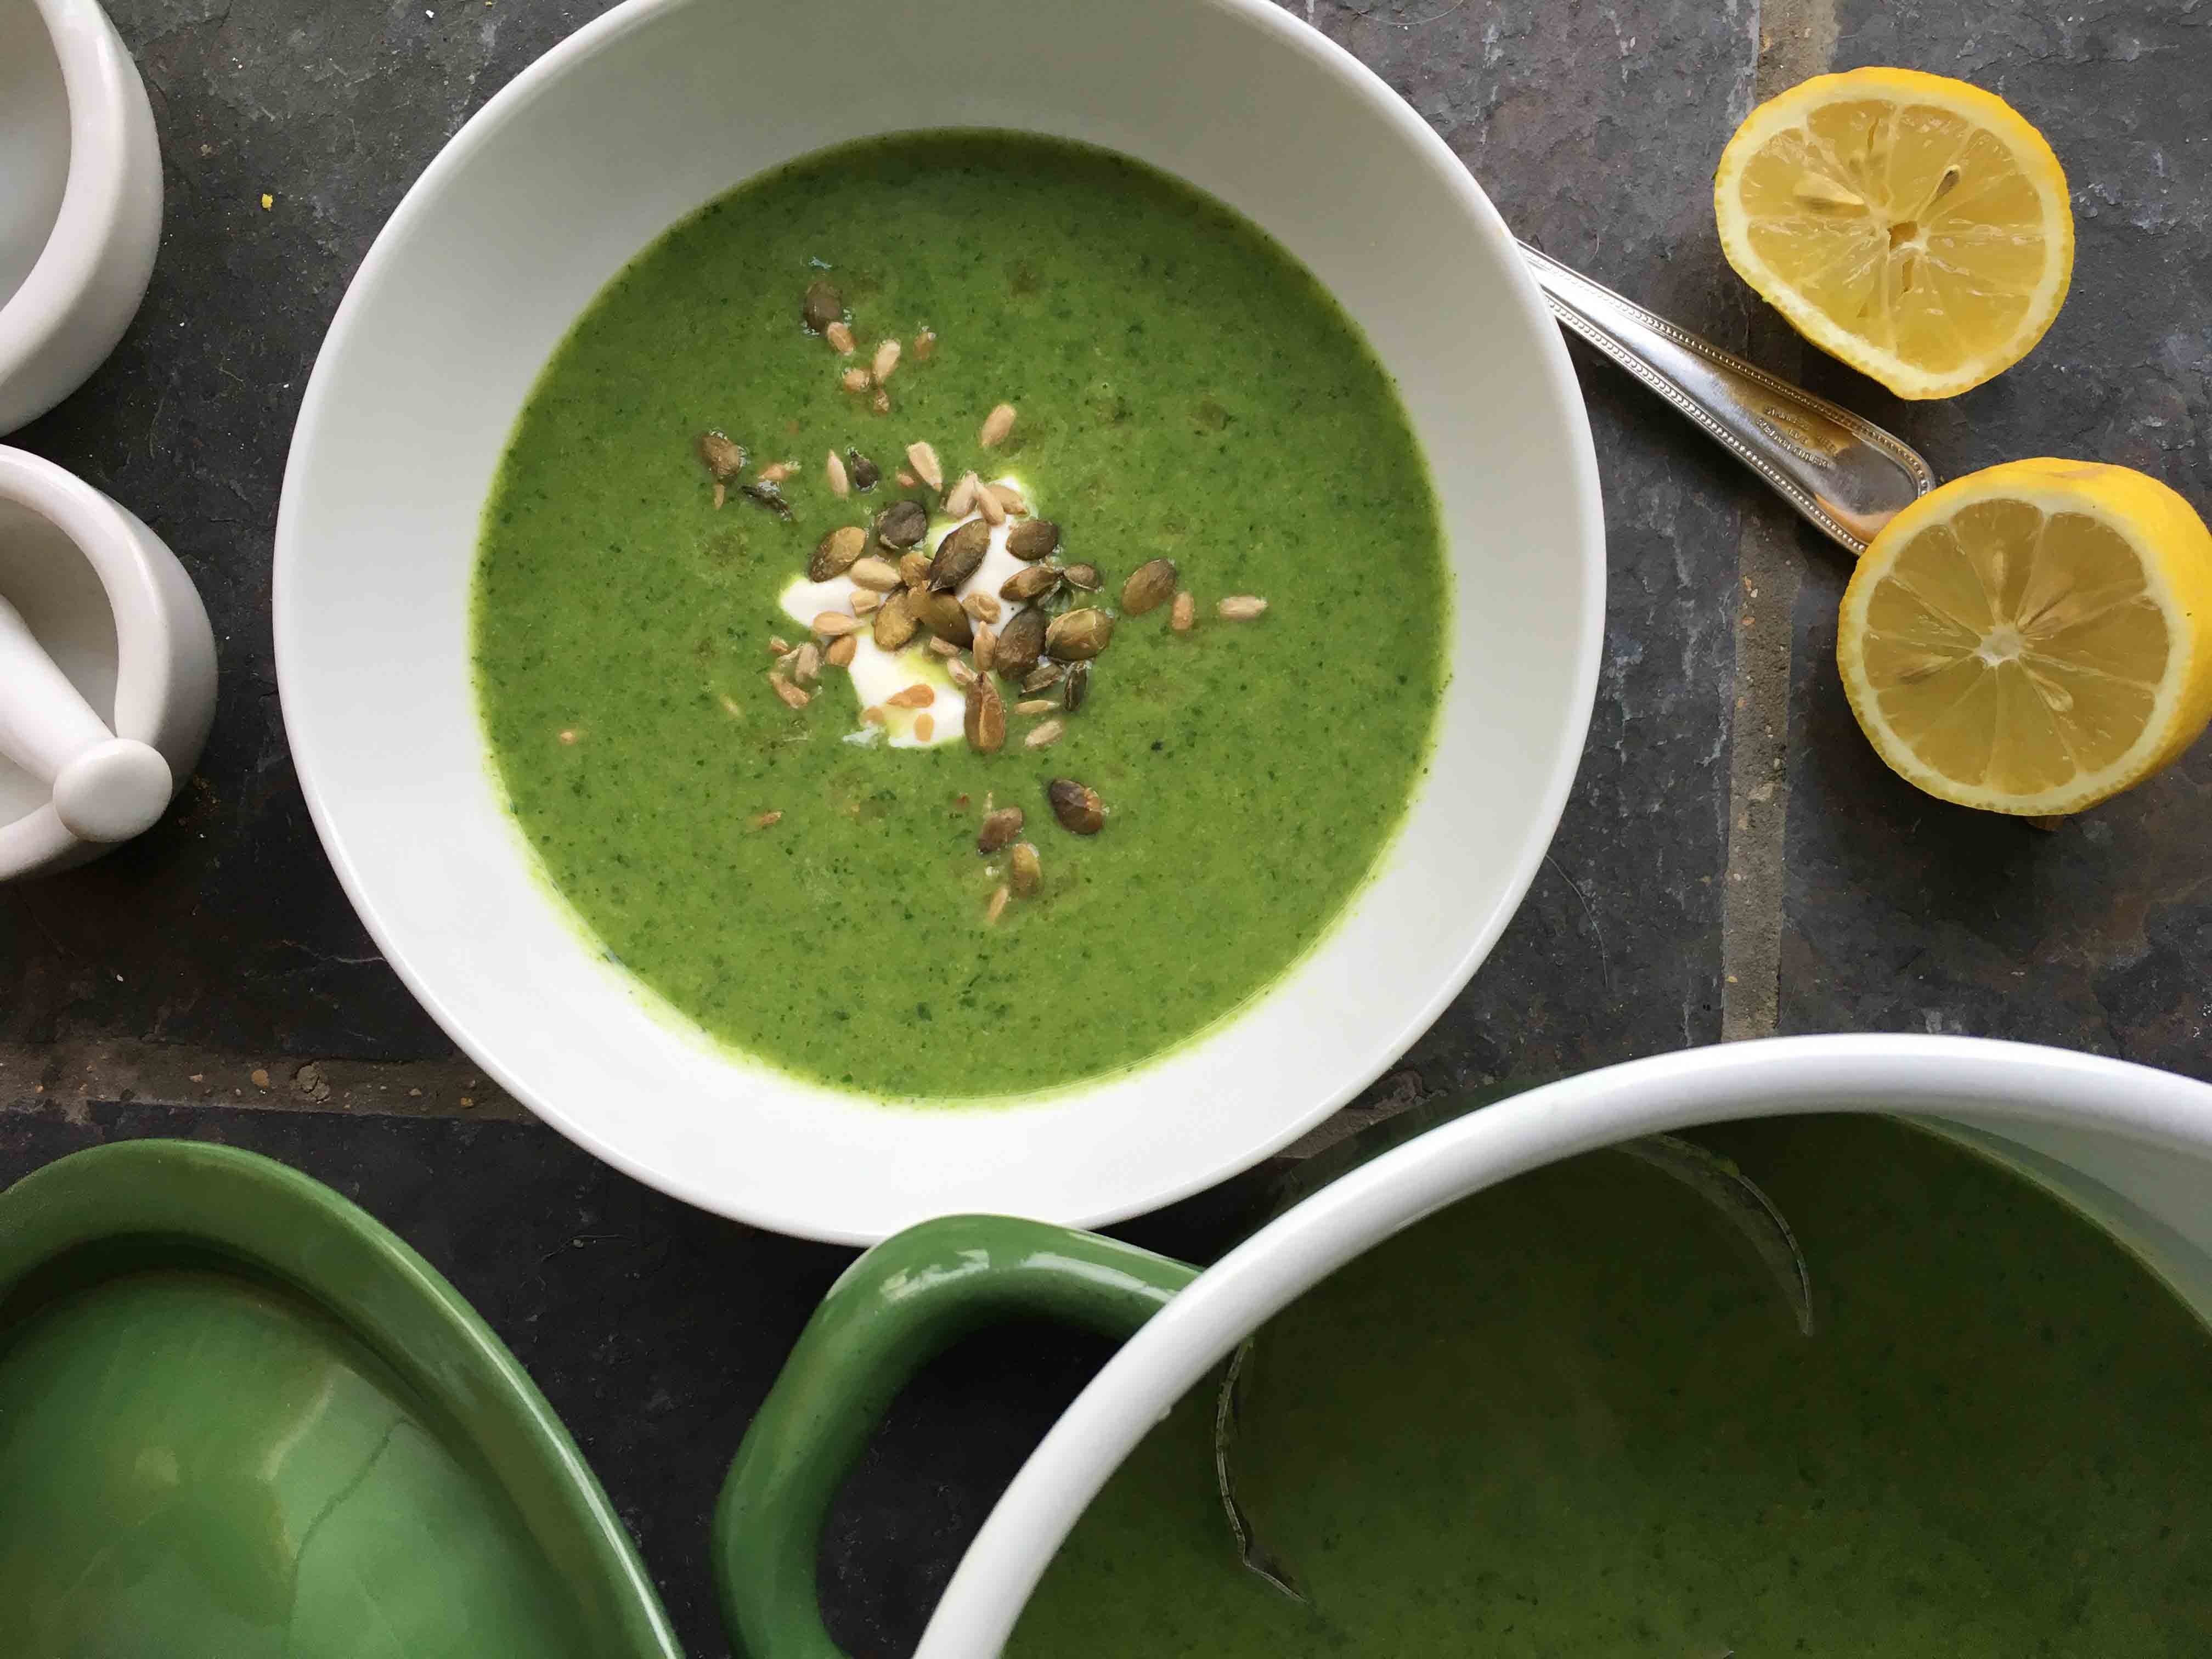
There are a million salads, juices, smoothies and soups doing the rounds but this soup is what I had for lunch today.  Broccoli, spring onions and spinach were languishing in the fridge, a plucky mint plant is soldiering on in the garden despite the rain and I was given a box of lemons yesterday.  I want to eat healthily but I also hate throwing away food.  This was the result.  I made a straightforward vegetable soup, the peas added a little sweetness to balance (!) the spinach, a spritz of lemon and fresh mint brought a hint of Spring to the party.  A dollop of Greek yogurt added a perfect richness whilst the seeds gave crunchy, tasty texture.

Clear your fridge and cleanse yourself at the same time.  Happy New Year!

Green Vegetable Soup

As I said, this is what I had in the fridge today.  Previous incarnations of this soup have included leeks, watercress, courgettes and chard.  All of these were probably looking a little past their best which is why they ended up in soup.  Use whatever you have. There is nothing to stop you buying the ingredients specifically for soup but isn’t it satisfying when these end up on your plate rather than the compost?

1 tablespoon olive oil

3 spring onions, finely chopped (use a regular onion if you don’t have any spring)

1 head of broccoli (approx 250g) chopped fairly small

1 clove garlic, finely chopped

1 large handful fresh spinach

1 cup of frozen peas (around 125g)

A few sprigs of mint

A few sprigs of parsley (if you have them)

750ml vegetable stock

Half a lemon

Greek yogurt to serve

Toasted sunflower and pumpkin seeds

Heat the oil in a pan and gently soften the spring onion.  Add the broccoli (you want it chopped fairly small to you don’t have to simmer it for hours) and the stock and cook for around 5 minutes until the point of a knife goes into a piece easily.  Add the spinach and peas and cook for another 2 minutes, then add the mint and parsley if using.  Stir so these are wilted and then blend.  Serve with blob of yogurt, a good spritz of lemon and as many seeds as you like.  Enough for 4 with something else or 2 if that is all you are having.


Oaty Mincemeat Squares

Oaty Mincemeat Shortbread 3

I often make something we imaginatively call Jammy Oaty Slice – can you guess what is in it?  Of course you can and I highly recommend it as a delicious tea time offering.  The other day I was looking at a tray of it cooling ready for scoffing and it reminded me of the mincemeat slice that used to adorn the bakers’ shelf at Christmas in Yorkshire.  Heavily dredged with icing sugar, it was completely white from the top and the layers were crisp and even (really!) in the way only a practised hand can accomplish.

So of course I had to have a go at making it myself.  Whilst I love mince pies, my immediate family (i.e. the ones I actually live with) don’t like anything with cooked raisins or dried fruit.   This means that if I make mince pies then I am the only one who will eat them unless we have friends over and when it comes to a Christmas cake…. Well, suffice it to say I ate all of the the last one which graced a tin in our house.  All of it and I made another in January because I had enjoyed it so much…..

These little squares are much safer then.  Rather than a huge cake winking at me from the corner I can safely eat one of these treasures with a cup of tea on a daily basis without having to book into the gym afterwards.   Like two layers of shortbread with mincemeat in between, somehow better than a traditional mince pie if that is not too shocking a statement? The oats add an extra element which is just right and of course go a good way towards balancing out the sugar and butter.  Heading for health food is what I say….

Oaty Mincemeat Shortbread

Oaty Mincemeat Squares

If you want to go for the original Jammy Oaty Slice then just replace the mincemeant with jam, I favour raspberry.  However, please do give them a go this Christmas, they are a million times easier than mince pies if you need to make a batch for a sale and are just delicious.

250g plain flour

125g oats

135g caster sugar

200g cold butter

1 teaspoon baking powder

1/4 teaspoon fine salt

450g mincemeat

Icing sugar

Preheat the oven to 180.  Line a tin of approximately 23cmx32cm  with baking parchment.  Whizz together the flour, oats, butter, sugar, baking powder and salt briefly in a food processor (you want it combined but not forming a ball of dough as it needs to be quite crumbly for the top layer).  Tip half of the mixture into the baking tin and press it to cover the base in an even layer.  Spread the mincemeat over this and then sprinkle the remainder of the mix evenly over the mincemeat and press it down gently.   Bake for 30-40 minutes until golden on top.  Remove from the oven and leave to cool completely before dusting with icing sugar and cutting into squares.

Oaty Mincemeat Shortbread 2


Meatloaf, Sliders and Meatballs

Meatloaf

I may have mentioned that between them my children like most foods.  Between them that is.  Together there often seems very little common ground.  My daughter would like to live on Sausage Pasta, my son doesn’t like sausages or pasta.  My son would live on salad, hummus and broccoli whilst my daughter would recoil from all three.  Finding something to cook that we all like is therefore challenging.  I am not keen on making different things for everyone but equally the greedy child in me remembers mealtime excitement being dashed when presented with something I didn’t like and I want my two to love their food.

You can imagine my delight therefore when they both scoffed this meatloaf with unseemly haste, plates completely clean, seconds requested and announced not only was it delicious but required on a regular basis.  The joy, the relief.  My son even said “Mamma, your meatloaf is amazing!” now, I don’t know if he has tried any other meatloaf but I happily took the compliment.

These ingredients result in a big old batch but it makes sense this way because the mince comes in 500g packs.  You could happily make two meatloaves and freeze one but I tend to mix it up a bit.  I made the sliders the size of a snooker ball which I then flatten a bit.  Once cooked (in the same way as the meatballs) they have a tendency to crumble a little but for me this adds to their charm as they hit the mark somewhere between a mini hamburger and a sloppy Joe in a bun with salad and ketchup.  The meatballs I freeze in a single layer on a baking tray and then put into a tub once frozen.  These I fry or roast until cooked through, cover in tomato sauce and serve with rice or orzo, inexplicably this being a pasta my son likes.

Meatloaf, sliders and meatballs

This may seem a long list of ingredients but you probably have most of it to hand anyway.  I reckon on this amount making one meatloaf, four sliders and about 12 meatballs.  The tomato sauce below is also great with the meatballs.  If you have any meatloaf left over it makes an incredible sandwich….

1 tablespoon olive oil

1 large onion, finely chopped

Salt

500g pork mince

500g beef mince

2 large cloves garlic, finely chopped

100g breadcrumbs

1 eggs beaten

1 tablespoon thyme leaves

60ml milk

3 tablespoons Worcester sauce

2 tablespoons ketchup

Small bunch parsley, finely chopped

Tomato sauce –

1 tin chopped tomatoes

1 tablespoon olive oil

1 clove garlic finely chopped

1 teaspoon brown sugar

1 tablespoons red wine or 1 tablespoon red wine vinegar

Preheat the oven to 200.  Heat the first tablespoon of olive oil in a frying pan and cook the onion, with a pinch of salt, until soft then allow to cool.  In a large bowl put the rest of the ingredients (apart from the sauce ones) and mix well together (hands are easiest for mixing this) along with the cooled onions, 1 teaspoon of salt and around 20 turns on the pepper grinder.  Split the mixture and form half into a loaf a similar shape but a little smaller than a housebrick and make the rest into sliders or meatballs (see introduction).  Put the meatloaf onto a baking tray and cook for half an hour but check after 20 minutes and if browning too much cover with foil.  Meanwhile put the second tablespoon of oil into a small pan with the garlic, heat gently and as soon as it sizzles add the tinned tomatoes, sugar, wine or vinegar and a good pinch of salt.  Let this simmer for twenty minutes.  When the meatloaf is cooked let it sit for five minutes and then transfer to a warm serving plate and pour over the sauce.  Enough for two adults and two children.

Meatloaf 2


Thai-ish Salad

Thai salad 2

Right I must say from the off that this is a Thai salad in the loosest possible sense.  Yes there is coriander, lime juice, fish sauce etc but also apple and radish and I’m not sure quite how authentic they are.   That said, it is fabulous to eat and sometimes I am happy to throw authenticity out of the window.  I think I mentioned it with Paella (January 2013) – I am not trying to recreate an original dish, I simply want to make something good to eat.

This is crisp, crunchy and jam packed with flavours.  The ginger, garlic and (small amount) of chilli give this life and heat whilst the herbs and lime bring zip and zing to the party.  You can leave out the apple if you want but I love their tangy sweetness and likewise the radishes, if they are not your thing omit them but they add peppery crunch and a beautiful pink.

It is a bonus for me that my children like this.  My daughter is a bit of a salad phobe but she adores and this and happily ploughs her way through a bowlful, sometimes adding a little more chilli and then smacking her lips and puffing as a result.   Its good to see them enjoying a bit of healthy salad at this time of year when we are rather surrounded by root vegetables and a lot of hardy brassicas.

This is fab with pork chops or roast chicken (hot or cold) and also works very well with leftovers.  In particular I’m thinking leftover turkey here but then that would make it a challenger to my beloved Christmas Salad (December 2013).  Never mind, we’ll just have both.

Thai salad

Thai Salad

Make the dressing first so that the flavours can sit and meld for a bit.

Juice of 1 lime

1 tablespoon rice vinegar

1 tablespoon soy sauce

2 tablespoons light olive oil

1/2 tablespoon fish sauce

1/2 teaspoon caster sugar

1/2 teaspoon sriracha or other chilli sauce

Small thumb ginger, finely grated

1 small clove garlic, finely grated

1/4 white cabbage

1 apple

6 radishes

2 carrots, peeled

1/2 bunch coriander

1/2 bunch mint

Mix the first nine ingredients together to make the dressing.  Taste and adjust as you see fit, a little more chilli perhaps?  Finely chop the rest of the ingredients and mix in a large bowl, add most of the dressing and combine.  You may or may not need all the dressing, it rather depends on the size of your cabbage and carrots!   Enough for 4 as a side.


Apple and Raspberry Crumble

Apple and raspberry crumble 4

I can’t tell you how much I love a crumble.  Plum crumble, rhubarb crumble, apple and blackberry crumble, all of them have a place on my table.  Childhood weekend lunches often finished with a fabulous, fruity and crunchy crumble whilst apricot crumble at school was a thing to celebrate, the best pudding of all and something that made other school food worth living through.

All that said however, I hadn’t thought of giving you a crumble recipe here.  Not out of meanness you understand, rather I thought everyone had a good, reliable crumble recipe up their sleeve to be whipped out when required. It was only after being asked for this particular recipe six time in a couple of months that I began to wonder and so I present it to you now.  Soft tangy fruit under a blanket of oaty, sweet and buttery crumble, let me tell you the sum here far, far exceeds the total of its humble parts.

This particular incarnation is my absolutely favourite, the bee’s knees and the vicar’s you know whats.  Although a straightforward apple crumble is still something to sing about, the addition of raspberries lifts it, their fruity tang and fragrance make this wholly lip smacking and satisfying which surely is what a pud is all about.  Can I rave little more?  It is and easy and cheap to make, a perfect way to use up any apples looking a little tired and frozen raspberries are perfect here so regardless of the season this can be on your plate in around an hour, start to finish.

Apple and Raspberry Crumble

Ideally use a combination of cookers and eaters, the bramleys are the ones that cook down to a velvety apple puree whilst the eaters retain a little bite.  I say 7 tablespoons of sugar and water as this is usually about right but depending on the tartness of your apples you may need more sugar and add more water if you think it is required.  You can cook the apples and make the crumble ahead of time but don’t put the crumble onto the fruit until you are ready to cook it as it will get soggy, ideally keep it in the fridge.

1 kg apples (see introduction), peeled, cored and roughly chopped

7 tablespoons golden caster sugar

7 tablespoons water

200g plain flour

100g cold butter, cubed

1/4 teaspoon salt

80g golden caster sugar

40g oats

150g frozen raspberries

Preheat the oven to 190.  Put the apples, the 7 tablespoons of sugar and water in a pan and cook gently until the apples are soft and broken down, about 20-30 minutes.  You may need a little more water once cooked and taste in case you need a little more sugar.  Do keep the apples tart though as the crumble bring sweetness to the party.  Meanwhile either whizz the butter and flour in a processor until it resembles breadcrumbs or do this by hand then add the salt, sugar and oats.  Tip the cooked apples into a suitable oven proof dish, I tend to use an enamel one which is 29x23cm and add the raspberries to this, mixing so they are evenly distributed in the apples, no need to defrost.  Tumble over the crumble and smooth it gently but don’t pack it down.  Cook for around 30 minutes or until bubbling at the edges and just browning on top.  This serves 6 or better still 4 with lots of seconds, I like it with cold cream or custard whilst my children prefer vanilla ice cream.


Blackberry Crumble Cake and the child who swallowed a fly….

Blackberry Crumble Cake

Once, when blackberry picking as a child, I swallowed a fly.  This moment has stayed with me and returns, annually.  Every year as I reach for that plump, glistening purple berry I remember the slightly panicked feeling that my eight year old self felt on the realisation that that fly had gone into my mouth and was not coming out.  The song about the old lady who swallowed a fly came rushing to mind and I wondered if I would have to follow her lead.  What actually happened was that I was encouraged to eat several more blackberries to help the fly down (remember no one walked around with small handy bottles of water in the early 70’s) and then get on with picking.

I can’t say I was harmed by this event as apart from my yearly recollection I adore blackberries and certainly wasn’t put off them by the experience.  Blackberrying is all part and parcel of autumn and I relish these moments during the year.  I’m an enormous fan of seasonal pursuits such as making marmalade when the Seville oranges are in season, elderflower cordial when those lacy white flowers are abundant and of course sloes to make fabulous heady sole gin with and then stash in a dark cupboard, saving for it for Christmas.

This cake will be ready to enjoy much sooner than sloe gin and is perfect to make with any blackberries you might pick at the weekend.  It won’t matter if any of them are squashed by little hands or in my case, by Tom putting his paw on the bag as we drove home.

Blackberry Crumble Cake

I made this in the summer with blackcurrants and raspberries and it was great, their tangy sharpness a perfect foil to the sweet crumble.  Now though I am using blackberries or plums, you could try apples and pears as well.   This would also work very well as a pudding with custard or cream (ideally followed by another slice for tea).

100g soft butter

100g golden caster sugar

2 eggs

175g self-raising flour

1 level teaspoon baking powder

1 teaspoon vanilla extract

3 tablespoons milk

Pinch of salt

200g blackberries (around 200g it doesn’t really matter if you have a few more or few less)

For the crumble –

25g butter

75g plain flour

40g demerara sugar

Preheat the oven to 170 and butter and baseline a 20cm tin.   Cream the butter and sugar together until pale and fluffy.  Add the eggs one at a time with a little flour each time then sift in the remaining flour and baking powder, add the vanilla, salt and milk and combine.  Put the mixture into the tin, smooth the surface and scatter over the blackberries.  Melt the butter for the crumble in a small pan mix it with the flour and sugar in a small bowl.  Sprinkle this over the blackberries and bake for 50-60 minutes but check after 40 and if the top is browning too much cover with foil.  Once it is done, leave in the tin for 20 minutes and then remove from the tin and tuck in if you are serving it warm as a pudding or leave to cool completely.  Dust with icing sugar if you want.

Blackberry Crumble Cake 3

You may recognise this recipe from last year, I am posting it again partly because it is perfect for this time of year but also because following our house move we still haven’t got any Internet. Back soon with lots of new recipes!


Courgette, Broad Bean and Feta Salad

Courgette and feta salad 2

I know I say that every new salad I make is my new favourite but truly, this is.  I must have made it six times in the last two weeks and still show no signs of getting bored.   Crunch from little new courgettes go amazingly well with the glorious double podded emerald green beans.  A flurry of snow white tangy, salty feta along with a lemony garlic dressing brings the whole thing together with a boom.   Completely fresh and seasonal and got to be good for you, what is not to love?  I implore you to make this while the courgettes are small and the beans are around.

Broad beans might not be everyone’s cup of tea when single podded and served in their sometimes tough, grey outer jackets.  This I would concur with, a reminder of school lunches, both chewy and a little bitter.  Unrobe them further however, reveal that stunning inner green and you are in for an absolute treat, a true taste of the English summer.

I admit you need quite a pile of pods to end up with 200g of the inner bean but it is a job I enjoy, sitting at the table releasing each bean from its cosy padded sleeping bag.  A gin and tonic would be the ideal accompaniment to this task and reminds me of sitting with my granny podding beans recently picked from her garden (she had the gin in those days obviously, not me).    Granny’s kitchen garden was one of my favourite places in the world and although its been many years since I was there I remember the rows of vegetables like it was yesterday.   My first taste of asparagus, artichokes and fennel came from here along with beans of all variety.  Fruit trees in one corner offered regular treats when I was wandering around and the strawberries and raspberries further delights if I could negotiate the netting on the fruit cage.  It was a dreamy place and the excitement of picking fresh produce has never left me.

You will see feta mentioned again and I admit it finds its way into a lot of my salads.  If you aren’t keen on it though a little labneh (simply drained yogurt) would be a perfect, less salty alternative or some fresh ricotta (Herby Ricotta, September 2014) a delicious addition.

Courgette and feta salad-2

Courgette, Broad Bean and Feta Salad

3 small courgettes

200g double podded broad beans,

100g feta, cubed

1 small clove garlic, crushed or finely chopped

Juice of half a lemon

2 tablespoons extra virgin olive oil

Salt and pepper

Fresh mint or marjoram, chopped to serve

Finely slice the courgettes and put into a bowl.  Blanch the beans in boiling water for 2 minutes then drain and run under cold water and drain again.  Mix the garlic with the lemon juice, olive oil and salt and pepper, taste and check you are happy with the seasoning but bear in mind the feta can be quite salty.  Turn the courgettes in the dressing and make sure they are well covered then add the beans and feta and mix the in gently, sprinkle with herbs and serve.  Enough for 4 alongside other things or 2 on its own.


Roasted Aubergine, Feta and Mint Salad

Aubergine and Feta salad

At this time of year I am happy to eat salad after salad.   By this I don’t mean just a regular green salad with a vinaigrette.  Rather piles of fresh crunchy vegetables with handfuls of fragrant herbs, texture from seeds or grains, creamy feta, labne or ricotta and all anointed with a punchy dressing designed to bring the components together.

I like a classic Nicoise or a retro Coronation as well as the next person and a perfectly made Caesar is a thing of joy.  More often though my salads will be veggie based, at once healthy and delicious whilst celebrating the bounty of salad leaves and vegetables spilling from the shelves during the summer months.  Tomatoes, courgettes, beans of all kinds, beetroot, aubergines, carrots, peppers either raw, steamed or roasted.   Loads of verdant green herbs bringing all their gorgeous flavours to the party and lots of salady leaves.  If there is meat or fish it will often be almost as a seasoning, some small cubes of chorizo or bacon for example or salty slivers of anchovy.

You will find lots of suggestions here, Green Beans with Tomatoes and Chorizo (September 2013), Christmas Salad (December 2013), Favourite Green Salad (January 2014) and Roast Vegetables with Pomegranate Molasses (July 2014).   I turn to all these regularly and honestly, never get bored of them.  Todays salad is a new kid on the block and celebrates that trinity of good friends aubergine, feta and mint.  I often use these ingredients in other dishes but this time wanted them to shine and along with some bulgar for body, leaves of rocket and a garlicky dressing it is a stellar combination.

Aubergine and Feta salad 2

Aubergine, Feta and Mint Salad

I have mentioned previously my determination to find a way to make all vegetables agreeable to my children but it would seem that aubergine may be my nemesis…..

2 aubergines, sliced and then cubed

1 tablespoon olive oil

100g bulgar wheat

1 large handful of mint, torn

100g feta (more if you like) roughly cubed

1 large handful of rocket

1 clove of garlic, crushed or finely chopped

1 teaspoon runny honey

Juice of 1/2 lemon

2 tablespoons olive oil

Salt and pepper

Preheat the oven to 200, turn the aubergine cubes in the oil and spread out on a baking tray (you may need two), sprinkle with salt and roast for 20-30 minutes until golden.  Put the bulgar wheat into a bowl with a pinch of salt and cover with boiling water to about 1cm over the bulgar and leave for 10 minutes.  After this time taste a bit, if it is still a little hard leave for a few more minutes before draining.   Meanwhile make the dressing by mixing the garlic, honey, lemon juice and oil, season with salt and pepper until you are happy with it.  Mix the bulgar with most of the dressing and then gently mix in the aubergine, feta, rocket and mint.  Taste for seasoning and just before serving pour over a little more dressing.  Serves 4 alongside other things.


Orzo with Bacon, Tomato and Cream Sauce

Orzo with bacon and tomato

This is a winner.  A little girl (aged 3) recently came to stay and when it came to teatime she wasn’t in the mood for any nonsense.  I was fairly confident she would like this as my children adore it, even my son who is absolutely not the first to request pasta, ever.

When  the time came to serve though, I realised I had forgotten the vagaries of young children and must admit, felt a brief tremor of nerves.  Hurrah, it was a huge success and she polished off three helpings much to the panic of my daughter who was eyeing the reducing seconds in the pan with alarm.

So offer this with confidence and not only to children, I make no secret of loving it and am often to be caught sneaking a spoonful or two from the pan before it disappears.

Orzo with Bacon, Tomato and Cream Sauce

Orzo is a rice shaped pasta we have a particular fondness for but use any small shape you like. I keep those little rectangular packs of pancetta in the fridge and along with some small packs of passata in the larder this becomes an almost store cupboard supper.

125g orzo

1 teaspoon olive oil

100g pancetta, pack sizes vary and a little more won’t hurt if that is what you have

1 clove garlic, finely chopped

100g passata

2 tablespoons cream

A few sprigs of parsley, chopped

Parmesan

Cook the orzo according to the packet instructions, probably around 11 minutes.  Meanwhile put the pancetta into a large frying pan with a teaspoon of olive oil and cook until well coloured and crispy in places.  Add the garlic and cook for a minute before adding the passata, stir and cook for a few minutes before adding the cream.   Drain the pasta retaining a little of the cooking water.  Put the pasta into the sauce, stir until combined adding a little of the cooking water if you need it to loosen the sauce.  Grate over some parmesan, add the chopped parsley and serve with more parmesan to hand.  Serves two adults or three children.


Cinnamon Pannacotta with Maple Syrup Apples

Cinnamon Pannacotta

To me this has a faintly Autumnal air about it and I had been saving it until the end of the Summer but then someone asked me for the recipe.  In truth it is good any day of year and as apples are around all the time a good one to have up your sleeve.

I adore Pannacotta, there is something about the creamy wobbliness that is irresistible.  Usually I make a vanilla version which I can then serve with any fruit that happens to be in season, pureed gooseberries, rhubarb and blackcurrants all being favourites.  Should the fruit bowl be bare however, then a good chocolate sauce (one without cream) makes them a pudding of dreams.  You can find my Vanilla Pannacotta here (July 2014).

This one came about because I’d made a note ages ago to combine cinnamon with apples and maple syrup and eventually got around to having a go.  A favourite North American combination I suspect and a possible Jelly Bean one too if that is your thing.  I tried pie and crumble and whilst a good combo the individual flavours got a little muddled.  An ice cream was a nice idea but try getting apples to make themselves heard against cinnamon in an ice cream.  This pannacotta really works though.  Gently bosky sweetness from the cinnamon goes so well with the creaminess of the pannacotta which is kept the right side of too rich with the addition of yogurt.  The apples and maple syrup compliment each other politely, allowing both to show themselves off.

Cinnamon Pannacotta with Maple Syrup Apples

On another occasion just make a panful of these sweet, soft apples and serve over vanilla ice cream.

200ml whole milk

100ml single cream

100ml Greek yogurt

1/4 teaspoon ground cinnamon

60g caster sugar

2 gelatine leaves

2 eating apples such as Braeburn, peeled, cored and finely sliced

1 tablespoon butter

2 tablespoons maple syrup

Put the gelatine in a bowl of cold water to soften.  Heat the milk, cream, cinnamon and sugar until it just reaches boiling point.  Remove from the heat and add the squeezed out gelatine, whisk well and leave to cool, stirring occasionally.  Whisk in the yogurt and divide between 4 ramekins or small metal moulds.  Put into the fridge for at least 4 hours to set.  About 20 minutes before serving prepare the apples,  melt the butter in a frying pan and cook the apples gently in this for about 10 minutes until turning golden brown and becoming floppy.  At this point add the maple syrup and cook for a further 5 minutes until the apples are well coated and the syrup reduced.  To serve, dip each ramekin briefly into hot water before turning out onto a plate and serve with the apples.  Serves 4.