Easiest berry cheesecake (two ways)

Searching for an easy summery pud?  Look no further.  This is a recipe that I have returned to time and again over the years and every time wonder why I don’t make it even more often.  So simple, fresh and delicious, a proper treat without weighing you down afterwards.  When it isn’t berry season I regularly turn to a jar of lemon curd and swirl that with the mascarpone/yogurt mix – the zip of lemon is bright and tangy and this also makes this even more a spur of the moment pudding.

If it is simply too hot to put on the oven you can just leave the biscuit base to set in the fridge or freezer for a while, it tastes just as good but isn’t quite as crisp or held together.  I have done both and have been happy regardless.  The creamy combination, whilst given silky richness by the mascarpone is still fresh and light from the addition of yogurt.

You can use any fruit you have to hand, here I used roughly a handful of raspberries and blueberries plus half a regular punnet of strawberries, some halved and some quartered.  On the off chance there is any left I suspect this would make rather a special breakfast.

Berry Cheesecake

Calling this a cheesecake may be a stretch, although tit does contain mascarpone, but happily here is no need for gelatine or baking it (bar the base if you want to).

Whilst the version you see here is fabulous for this time of year I would strongly urge you to try the lemon curd version – gently swirl half a jar of good lemon curd into the creamy mixture, don’t be too vigorous, the contrast of yellow and white is rather pleasing – and then spread this over the base.  You could finely grate some lemon zest on top if you wish.

250g digestives, broken into crumbs

120g melted butter

Pinch of salt

250g mascarpone

250g Greek yogurt (or Greek style)

50g icing sugar

400g approximately of berries or half a jar of lemon curd (see intro)

Preheat the oven to 180 (cooking is optional, see intro) and line the base of a 23cm springform tin.  Mix the digestive crumbs with the melted butter and salt and press into the tin.  Bake for 10 minutes then leave to completely cool (you can do this earlier in the day and keep in the fridge).  Mix the mascarpone, yogurt and sugar together, it will stiffen slightly which is fine (again you can do this ahead and store in the fridge).  Remove the biscuit base from the tin and then spread it with the creamy mixture.  Scatter over the berries and serve.  This could serve 8 but I would rather it served 6.


Fruit and seed flapjacks (but not really a flapjack)

I didn’t have a sweet tooth before I had children.  During my working years I could happily keep a packet of chocolate buttons in my desk drawer for weeks only tucking into one or two per day.   Now I am pretty much Olympic standard when it comes to polishing off a bar of chocolate.  I give up chocolate each year for Lent but even then have a couple of caveats.  The first is that I am giving it up solely in the form of confectionary – should someone present me with a chocolate pudding, I would, in the name of courtesy, not dream of turning in down.  Equally when I am judging – for those unaware, I am a food judge – I am required to taste everything put in front of me.

So this abstinence for what always feels like a very long 40 days means I am regularly to be found scrabbling around my cupboards looking for something sweet after lunch or supper.  Thus I have arrived at these kind-of-flapjacks.  Actually they are more of granola / muesli / fruit and seed bar but those sound new fangled and anything containing oats which is baked and cut into bars feels like a flapjack to me.  I have tried many permutations trying to reduce sugar in any form and have ended up here.

These are miles away from the delicious, but slump inducing, traditional flapjacks (for which there is a recipe here October 2013).  The version below is packed with good stuff, oats, seeds and dried fruit along with a banana – some sugar and honey yes but I have tinkered with this recipe reducing the sugar each time so once you divide it up, well, it isn’t so bad and these are a treat after all.  Perfect for a packed lunch or a picnic and useful to have in a tin for when you find yourself turning out a cupboard searching for chocolate.

As with most of my recipes there is room for manoeuvre and you can use the dried fruits you have in the cupboard, same with the seeds.  You can even use a handful of nuts in place of some of the seeds, just keep the weights in line with those I suggest below.  Finally, its worth mentioning that these are by no means just for Lent, tuck into them any day of the year you want.

Fruit and seed flapjacks

75g butter

80g soft brown sugar

60g honey

200g oats

150g dried fruit, I use dried cranberries, sultanas and chopped apricots

150g seeds, I use sunflower seeds, pumpkin seeds and sesame seeds

I ripe banana, mashed

Preheat the oven to 160C and line a 20cm square tin.  Melt the butter in a pan with the sugar, honey and a pinch of salt.  Put the oats, dried fruit and seeds in a bowl and mix.  Add the melted butter and sugar to the bowl, mix well then add the mashed banana and mix again.  Put into the prepared pan, press down lightly, level the top and bake for 30 – 40 minutes until just bronzed on top.  Leave to cool and then cut into squares or bars.


Soup and pudding

Much as I love the indulgences of Christmas I also relish the clean new page of January and the opportunity it presents.  In December we are encouraged to tuck in.  Have whipped cream on that!  Would you like gingerbread syrup?  Brandy butter and cream with your minced pie?  Why not it’s Christmas.  So it goes on….  Then suddenly, on the first of January it’s all about kale, steamed vegetables, cutting out food groups, veganuary.  It all feels a bit bonkers, the change from the rich sparkly food filled photographs of December to the austere, vegetable dotted ones of January.

I’ve mentioned in previous January posts that whilst it’s not for me to tell anyone what to eat I am happy to provide the sort of recipes that will help with the reset.   Although that fresh clean page of the New Year encourages good, healthy eating I am still greedy.  I want to get excited about food, love the look it and love the taste even more.  January tends to be cold and often rather grey, we need a lift and food is such an easy and satisfying place to get it.

Not the time for leafy salads, now is for crunchy numbers full of the root vegetables that relish the cold.  That they tend to grow locally is of course a bonus.  I had a celeriac lurking in the fridge that had arrived before Christmas.  Yesterday I made half into a soup along with a couple of sad, beginning to sprout potatoes, a leek plus half a bag of rocket.  The other half I grated and made into celericac remoulade (January 2016).  Some slightly bendy parsnips, carrots and beetroots were roasted back into deliciousness.  The result was enough for two lunches plus a packed one and I was relieved to avoid the guilt felt if anything has to the compost having been found at the back of the fridge past its best.   Fridge clearing at its best.

My advice would be to go large on the veg – soup is the number one superstar for using up various vegetables as well as being extremely good for us.  Put soup into the search bar at the top of this page, there are lots of different, easy soups you could rustle up. Vegetable based soups are cheap too which is a bonus at this time of year.  Easily zhuzzed up into a Saturday lunch with some really good bread, homemade focaccia (May 2014) or soda bread (December 2018) if you want to along with a crunchy salad makes this a feast rather than a sad offering.  If you still have some Christmas cheese looking less than tempting, transform it into cheese and chive scones (October 2014) or my Cheese bread (December 2014).

When it is particularly cold outside a pudding always seems essential to me.  There are two routes you can take here – something, clean and refreshing to reinforce your good intentions such as the granita shown at the top of this post.  The gloriously coloured blood orange granita is of course a seasonal treat (February 2013) but the golden one behind it is an iced tea granita (July 2013) and who doesn’t have a teabag in the cupboard?  Light and palate cleansing yet sweet and fruity enough to be a treat.  Alternatively choose the nursery pudding route to warm yourself up from the inside.  You will find lots of such puddings in the recipes here, this weekend we had a big baked golden syrup sponge – along the lines of the raspberry larder pudding (March 2015) but using half a tin of golden syrup in place of the raspberries and raspberry jam.  Yes it was rich, sweet and super indulgent but it was also extremely good and provided the necessary ballast for the weather along with lifting the spirits.

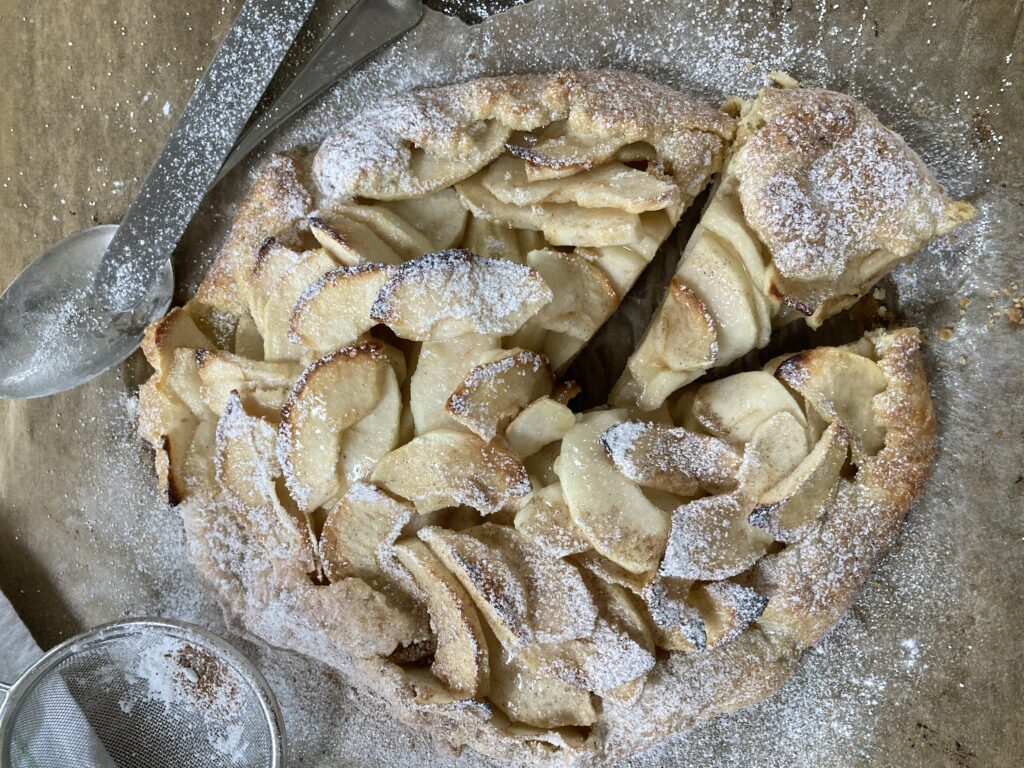
Apple Galette

Although apples are available all year it is in Autumn when I think of cooking with them.  Laden apple trees in the early morning mist are a treat to behold and biting into a crisp juicy apple is the autumnal equivalent of a handful of Summer strawberries snaffled from the fruit cage.  We have several apple trees in the garden in varying stages of vintage and productivity.  Unfortunately late frosts this Spring did not suit some of the trees and one hasn’t produced a single apple.  The Bramley is usually my failsafe and I make lots of puddings based on its large generous apples that cook down to fluffy snow.  Sadly it is a little disappointing this year but one of the eaters has masses of fabulous, crisp and delicious apples.

Eating apples obviously cook in a different way to the Bramleys so I look to different recipes to make the most of their firmer flesh and sweet tang.  There couldn’t be a better way to showcase those qualities than this fabulous galette.  Sweet crumbly pastry that is the work of minutes (I promise) encases slices of apple.  Genuinely one of the easiest puddings to make, it comes into its own at this time of year and regular visitors to this site will know its close relation the plum galette.

I make this often, fruit based puddings being one way I can persuade myself (as if) it is ok to tuck in to a pud.  That this one is so genuinely full of apples means I have even turned a blind eye on occasion to it being breakfast.  What?

Apple Galette

Generally I keep this fairly simple but if you want to go for an apple pie vibe then add a little ground cinnamon into the chopped apples or dust the cooked galette with some icing sugar combined with cinnamon.  You only need a teaspoon of beaten egg for the glaze so take it from another egg that is being cracked for another purpose if possible otherwise use milk.  The galette in the picture used four big, tennis ball sized apples and maybe there were a couple of slices too many, three would have been fine.  I don’t mind too much apple but let you know this as a guide.

100g plain flour plus a heaped teaspoon extra

60g cold butter, cubed or grated

A good pinch of fine salt

60g caster sugar, divided in two

30ml cold water

4 crips eating apples, peeled, cored and cut into slices

Squeeze of lemon juice

A teaspoon or so of beaten egg (see introduction)

A dessertspoon of demerara or caster sugar

Preheat the oven to 190 and put a baking tray into heat up.  Put the flour and butter into a medium size bowl and rub together with your fingers.  There isn’t really enough to justify getting a food processor out. When it looks like breadcrumbs add the salt and 30g of sugar followed by the water, bring it together into a ball, wrap in clingfilm and leave somewhere cool for half an hour.  Mix the sliced apples with the teaspoon of flour, remaining 30g of sugar and a squeeze of lemon juice.   Roll out the flour to a rough 30cm circle and place on a sheet of parchment, tumble the apples onto the pastry leaving a good gap and turn this pastry edge over the apples.  Brush with your glaze, egg or milk and sprinkle with the dessertspoon of sugar.  Carefully transfer the galette on its parchment paper to the hot baking tray and bake for 25-30 minutes until golden brown on top and crisp underneath.  Let it cool for a few minutes as the apples will be piping hot before dusting with cinnamon icing sugar if desired (see intro).


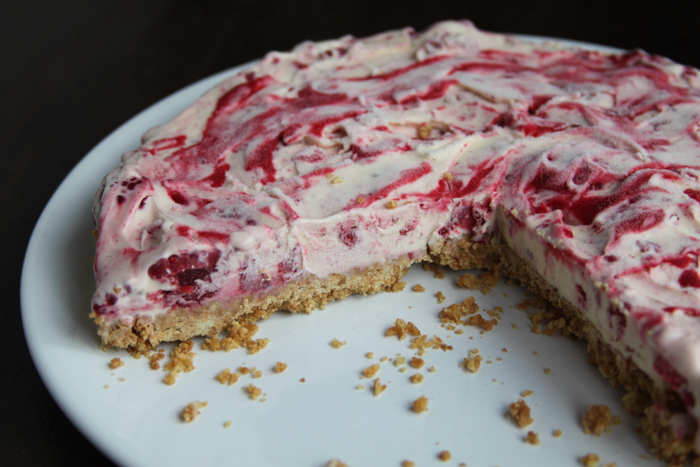
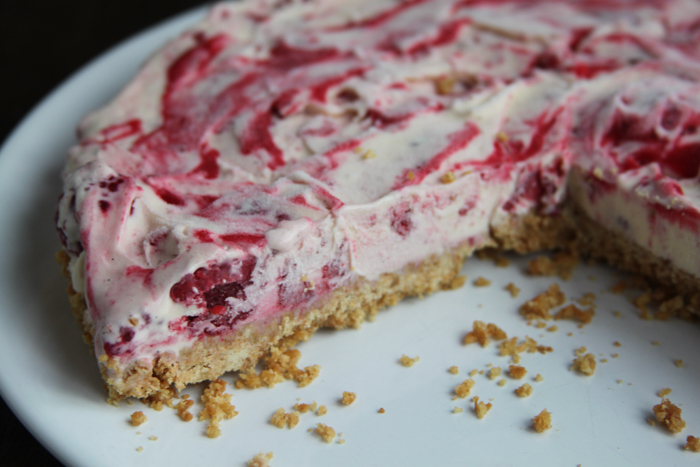
Raspberry biscuit ice cream cake

Barely even a recipe this requires very little effort and few ingredients.  Just a determination to make a pudding with not much to hand.  Raspberries and ice cream from the freezer and a pack of biscuits from the cupboard – I used digestives but you could happily use shortbread or ginger nuts.  Equally whilst I only had vanilla ice cream available this would be fabulous with chocolate ice cream.   A bit of bashing and mushing results in a pud that far exceeds expectations and made use of whittling lockdown provisions.

Raspberry biscuit ice cream cake

200g digestives

75g butter, melted

350g vanilla ice cream

200g raspberries divided into two lots of 100g

1 tablespoon icing sugar

Take the ice cream from the freezer and let it soften while you get on with the biscuits.  If your raspberries are frozen do the same with them.  Bash the digestives to crumbs in a bag, mix with the melted butter and put into a 20cm loose bottom tin.  Mash 100g raspberries with the icing sugar and swirl into the ice cream, add the whole raspberries and pour the whole lot onto the biscuit base and freeze for an hour.  This will serve as many, or as few, as you choose.

Apple Turnovers (2)

If pushed I think an apple would my choice if only able to eat one fruit ever again.  I love summer berries and would find it particularly difficult to cast aside juicy raspberries or fragrant, almost scented, wild strawberries but an apple would pip them all to the post.  Not only is it hard to beat the juicy, tangy crunch of a perfectly ripe apple but they work so well in all manner of recipes, both savoury but particularly sweet that one might never become bored.  Lacking the glamour of blowsy, vividly coloured summer fruits they are more the sensible prefect of fruits – jolly reliable and a proper all rounder.

Lucky enough to inherit a collection of apple trees when we moved here and having subsequently added to our small orchard, now is the time of year when we are spoilt.  Various eaters and a hugely prolific Bramley mean apples feature on our menu several times a week.  The turnovers in the photograph were an after school treat at the end of last week and a simple form of apple strudel hit the table for pud on Sunday.  A bowl of stewed apples alternate with plums to accompany granola and Greek yogurt for breakfast and an apple crisp is on the cards for supper tonight.

There are apple pies of course and crumbles (try my Apple and Raspberry Crumble, October 2015), elegant apple tarte fines, apple cobblers, crisps and Betty’s.  Grated apple works a treat in a treacle tart to soften that super sweet hit and I like it mixed with mincemeat for a slightly less rich and more tangy pie at Christmas.   My super easy Tarte Tatin (January 2019) enjoys regular outings here as does the Crunchy Apple Pudding (January 2015).  The sharp apple makes a perfect foil to sweet pastry and oaty crumbly toppings;  it melds perfectly with cream whether straight or in the form of ice cream or custard which is why it makes so many appearances as a pudding.  Apples and cinnamon?  A life long love affair and a little tangy apple works amazingly well in cinnamon buns.

So make the most of wonderful apples.  We grow them here and right now you can enjoy them super fresh without having travelled a thousand miles or languished for months in cold storage.   Check out farm stalls and farmers markets for locally grown and unusual varieties – above all make a delicious apple pudding – with all that fruit under the crumble, well its almost health food.

Apple Turnovers

These are a little different to the filo wrapped turnovers I wrote about in Turnovers and leftovers (October 2016).  Not only do these use puff pastry (as that is what I had to hand) but they also combine cooking and eating apples.   This means you get the fluffy Bramley which breaks down to a fluff along with small pieces of the eaters which retain a little bite.  The strudel I mention in the introduction was essentially a large, long turnover using the other half of the pack of puff pastry.  It was eaten before I could take a photograph.

1 large Bramley apple, peeled, cored and cut into small dice

2 eating apples, peeled, cored and cut into small dice

4-5 tablespoons caster sugar plus some extra for sprinkling onto the turnovers

A couple of tablespoons of water

1/2 pack of puff pastry

Milk or a little beaten egg

A little flour

Icing sugar to dust (optional)

Preheat the oven to 200.  Put apples, sugar and water into a large pan and cook gently until the Bramley has broken down and the eaters have lost their crispness.  Taste, you may need a little more sugar and when you are happy with it leave to cool.  Roll out the puff pastry on a lightly floured surface into a rectangle and cut into six squares.  Put a tablespoon of the apple onto one square of pastry, sort of in the right angle, brush the edges with milk or egg wash and fold over to make a triangle pressing the pastry well to seal, use a fork if you like.  Repeat with the other 5 and put onto a parchment lined baking sheet.  Brush a little more milk or egg over the triangles, sprinkle with caster sugar, cut a couple of slits in the pastry and bake for 12-15 minutes until puffed, bronzed and crispy.  Allow to cool a little before dusting with icing sugar if you like.  Makes 6 and depending on the size of the apples used you may have some apple left which would be delicious for breakfast…


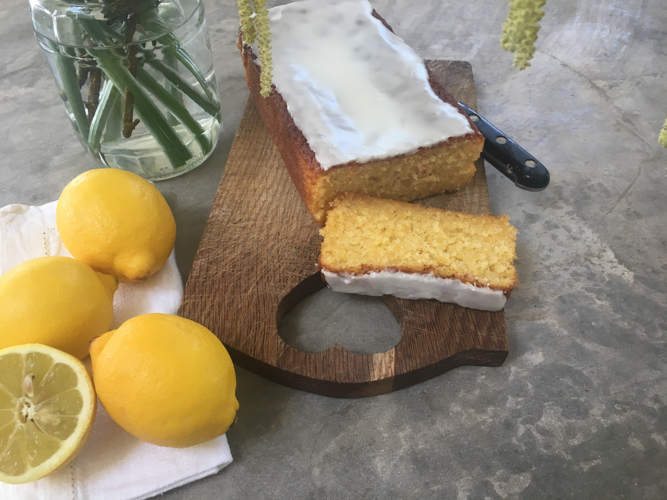
Spring Lemon Cake

I can’t tell you how many lemons have been squeezed and cakes made here in the name of research.  Lemon drizzles, lemon curds, lemon polentas and of course there is the layered beauty that features here in Lemon Cake and the 1970’s (May 2013) and often graces our table as our Easter Cake*.

I’m happy to eat a lemon based cake any day of the year but in Spring it seems even more appropriate.  That bright yellow zip and zest works perfectly when there is still a nip in the air but green shoots are on show and the hope of sunny days feels well founded.  This then is a cake for teatime, picnics or rainy days, trips to the beach, eating outside or in front of the fire and, of course, for all those school bake sales.

This modest looking little loaf cake has been tried and tested in many incarnations and this  is my favourite.  It couldn’t be easier, is very quick and a doddle if you have children who want to make a cake.  If you don’t have any lemon curd don’t worry it will still be delicious but it’s worth having a jar of good curd in the fridge for such occasions.  You can stick with a crunchy sugar and lemon drizzle if you prefer but this lemony icing is our perfect topping.  Finally, whilst I am a huge fan of butter, it has become quite expensive and Stork or similar works brilliantly here – if its good enough for Mary Berry, its certainly good enough for me!

Spring Lemon Cake

160g butter or Stork (see introduction)

120g caster sugar

Good pinch of salt

2 large eggs

140g self raising flour

1/2 teaspoon baking powder

Zest of one large unwaxed lemon

2 tablespoons milk

2 tablespoons lemon curd (see introduction)

150g icing sugar

Juice of 1/2 – 1 lemon

Preheat the oven to 180 and line a loaf tin.  Cream the butter or Stork and sugar together until light and fluffy, I use a stand mixer for this but a wooden spoon and bowl work a treat too.  Add the eggs one at a time with a spoonful of flour until well incorporated and then add the remaining flour, salt, baking powder, zest and milk.  Finally swirl in the lemon curd leaving a few streaks.  Put the mix into the lined tin and bake for 40 minutes.  Check after 30 and cover with foil if its brown on top before a skewer comes out clean.  Whilst the cake is cooling, mix the icing sugar and lemon juice (add the juice slowly as you may not need it all) and then pour over the top of the cake.  Leave to set and then tuck in.


*Whilst I know a Simnel Cake is the usual Easter offering and I love it, none of my immediate family like fruit cake (also my daughter is allergic to nuts).  Besides, we all know what happens to a cake when only one person likes it……

Blackcurrant Fool

Well, here is a blast of summer.   I’ve made no secret of my feeling that a weekend lunch isn’t complete without a pudding and we’ve tucked into no end of rib sticking treats appropriate to the colder months of the year.  Golden syrup sponge, plum galette, apple crisp, raspberry larder pudding and a whole host of crumbles have made an appearance recently.  Poking around in the freezer last weekend however I found a bag of blackcurrants which I’d picked last year and had been languishing in the icy depths since then.  Whilst my surprise clearly illustrates that I am not one of those with a list detailing the exact contents of the freezer, the weight and when it was frozen etc – I was jolly pleased with my find.

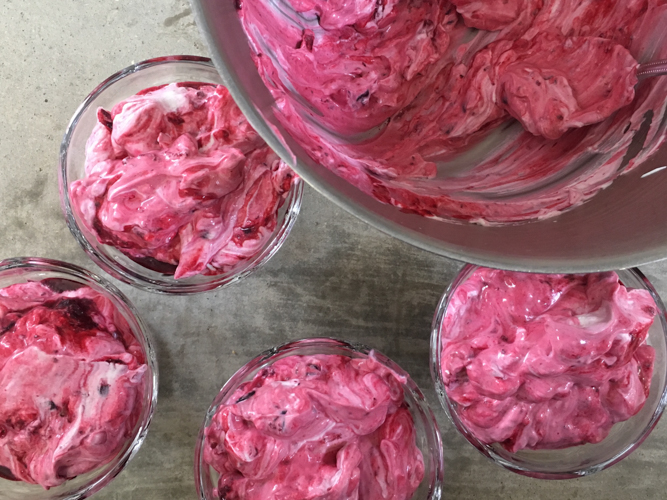
Thawed and simmered briefly with sugar I mixed them with cream and yogurt and we delighted in that mouth puckering, tangy, fragrant hit that is unmistakably blackcurrant. Should you have any berries in your freezer I highly recommend making this or simply buy a bag of frozen berries – I use them all the time in the winter for various recipes.

Blackcurrant Fool

Don’t worry if you have a few less (or more) blackcurrants – a fool is pretty forgiving and 20/30g either way won’t make much difference.  Equally if you need to use a bit less cream or yogurt the end result will still be fruity and delicious.

500g blackcurrants

100g caster sugar

200g double cream

200g Greek yogurt

Simmer the blackcurrants for about 10 minutes with the sugar until the fruit has broken down and the juices have become syrupy, cool.   Whisk the cream until soft peaks hold, add the yogurt, mix again briefly and then swirl in the blackcurrants.  Combine as much as you want – I like to seem some seams of pure blackcurrant but it is up to you.  This served 4 with a bit left over for someones breakfast.


Tarte Tatin

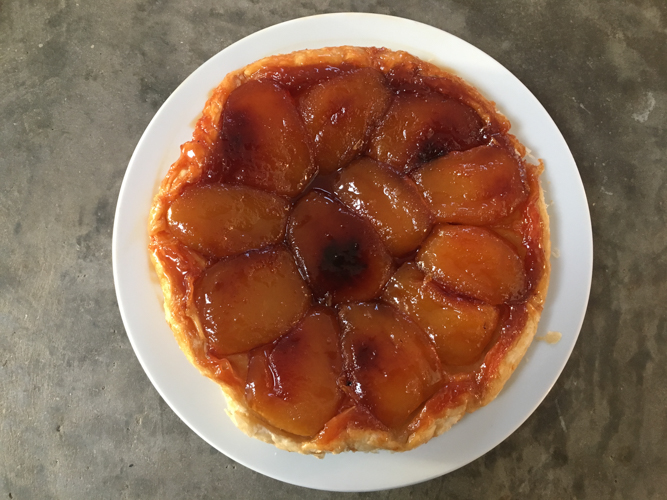
Well this is a proper treat and even better supremely easy to make with only 5 ingredients! That combination of tangy apples bathed in caramel sauce with a crispy, flaky pastry base, just fabulous.  Whilst there are many recipes out there for Tarte Tatin, this one is so simple and delicious that I rarely deviate.  It works like a dream and there is never any left over.   By the way if you are a fan of salted caramel puddings just up the pinch of salt in the ingredients to about 1/2 a teaspoon and voila you will have Salted Caramel Tarte Tatin.

A frying pan with an oven proof or removable handle is ideal but if you don’t have one just cook the apples in a regular frying pan and then transfer to a baking tin before topping with pastry and putting in the oven.  I use a 20cm le creuset that I have had for ever and these amounts work a treat and we easily finish it between the four of us.  I have also used a 30cm saute pan (also le creuset) which make a great big tarte but I did need a little help turning the pan over on to the waiting plate.

Tarte Tatin

I tend to use a pack of ready rolled puff pastry for this.  With a bit of careful cutting out (and patching for the second) I can get two circles of pastry out of one roll so either make another tarte tatin, freeze it or make the Onion Tarte Tatin with Blue Cheese (February 2014)…. just saying.  *Make sure the pan is really full of apples before you start cooking them, they do cook down and you don’t want to end up with not enough apples for the pastry.

4/5 large eating apples, Braeburn are ideal, peeled, cored and quartered*

60g butter

50g caster sugar

1 pack ready rolled puff pastry (usually around 375g)

Pinch of salt (see introduction)

Preheat the oven to 200.  Unroll the pastry and measure out a circle using the top of the pan.  Melt the butter with the sugar and add the apples along with a pinch of salt.  Cook for around 20-30 minutes until the apples are tender but not collapsing.  As it bubbles a caramel will form.  Turn the apples a couple of times for even cooking.  Remove from the heat, ensure all the pieces are round side down then extremely carefully place the circle of pastry over the apples and tuck the edges between the side of the pan and the apples.  Put in the oven for 20 minutes or until the pastry is golden and puffed up.  Take the pan out remembering of course that the handle will be hot and let it sit for a couple of minutes to settle.  Using a plate with a lip so you don’t lose all the sauce, invert this over the pan and quickly turn both so that the tarte ends up on the plate pastry side down, apple side up.  Adjust any apples that have slipped out of place and serve with cream.  I divide this into quarters for the four of us but reckon I could eat half without much trouble….


Cinnamon Buns

Sweet, squidgy, fragrant with spice – what’s not to love about a cinnamon bun?  As yet I haven’t met anyone who doesn’t weaken at the knees with the mention of a CB.  My children adore them and regularly make urgent requests for me to bake some.  There is no great secret to making these, bread flour rather than plain gives that fluffy soft dough which is then wrapped around a buttery, sugary cinnamon filling.   The final flourish of icing completes the picture and makes them pretty much perfection in our book.

So, whilst these are super easy to make remember to allow a bit of time.  Like other recipes using yeast it requires a couple of rises.  I give myself about a 4 hour time frame (which includes cooling them if you are going to ice them) but there isn’t more than about 30 minutes of hands on time.  Just letting you know in case you want to get them ready for the end of school….

Cinnamon Buns

I find a stand mixer easiest for this as it is quite a soft dough.

450g strong white bread flour

7g yeast

7g salt

60g soft brown sugar

1 teaspoon cinnamon

225ml milk, warmed to just blood temperature

1 egg beaten

75g soft butter, cubed

For the filling –

100g soft butter

80g soft brown sugar

2 heaped teaspoons cinnamon

200g Icing sugar

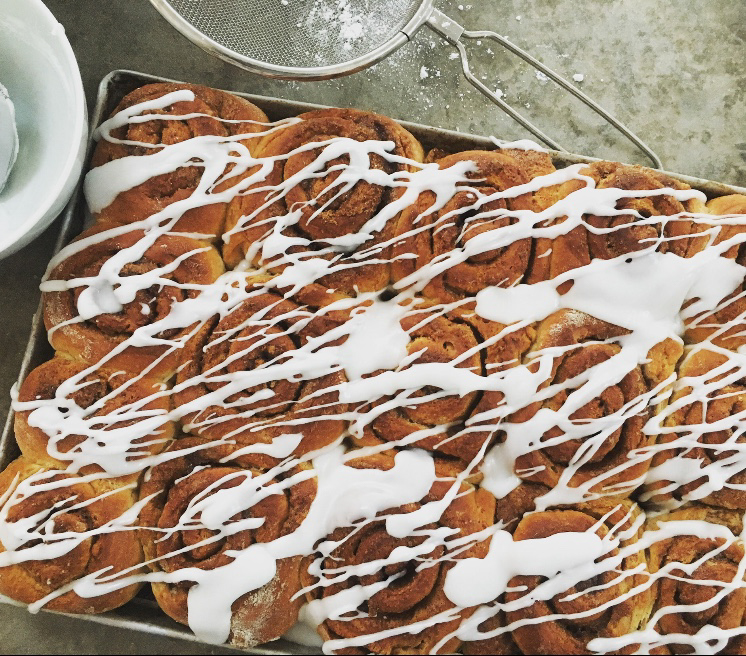
Put the flour, yeast, salt, 60g sugar and cinnamon into the bowl of your stand mixer.   Once mixing add the warm milk and beaten egg followed by the 75g soft butter, a bit at a time until it comes together then let this mix for 5 minutes.  Leave to rise for an hour in a warm, draught free place.   Roll the dough out on a floured surface until approximately the size of a tea towel then spread with the 100g soft butter.  Mix the 80g soft brown sugar and 2 teaspoons cinnamon together and then sprinkle this evenly over the butter.  Roll up from one of the long sides and then cut into even pieces about 2cm thick.  Depending on the length of your roll you’ll get about 12-16.  Place these cut side down and well spaced on a large baking sheet and leave to rise again for another hour.  Just before the time is up preheat the oven to 190 and then bake for 25-30 minutes until puffed up and golden.  Leave to cool.   Sift the icing sugar into a bowl and mix with just enough water to get the consistency you are happy with before trickling it over the buns either neatly and artistically or rather more erratically as I have done in the photograph above.