Roast Vegetables with Pomegranate Molasses

Roasted Veg Salad 3

I went into the larder yesterday and a pile of vegetables were gazing balefully at me.  I had bought them for the weekend but we had done other things and my menu plans had gone awry.  As I am going away I knew they needed to be eaten up, there is nothing worse than having to throw something away which was fine one minute and gone off the next.  So, courgettes, peppers, aubergine and onions all jostling for the top spot.  Aubergine curry, a provencal tian, soup – lots of things crossed my mind but it is hot and I wanted a salad.

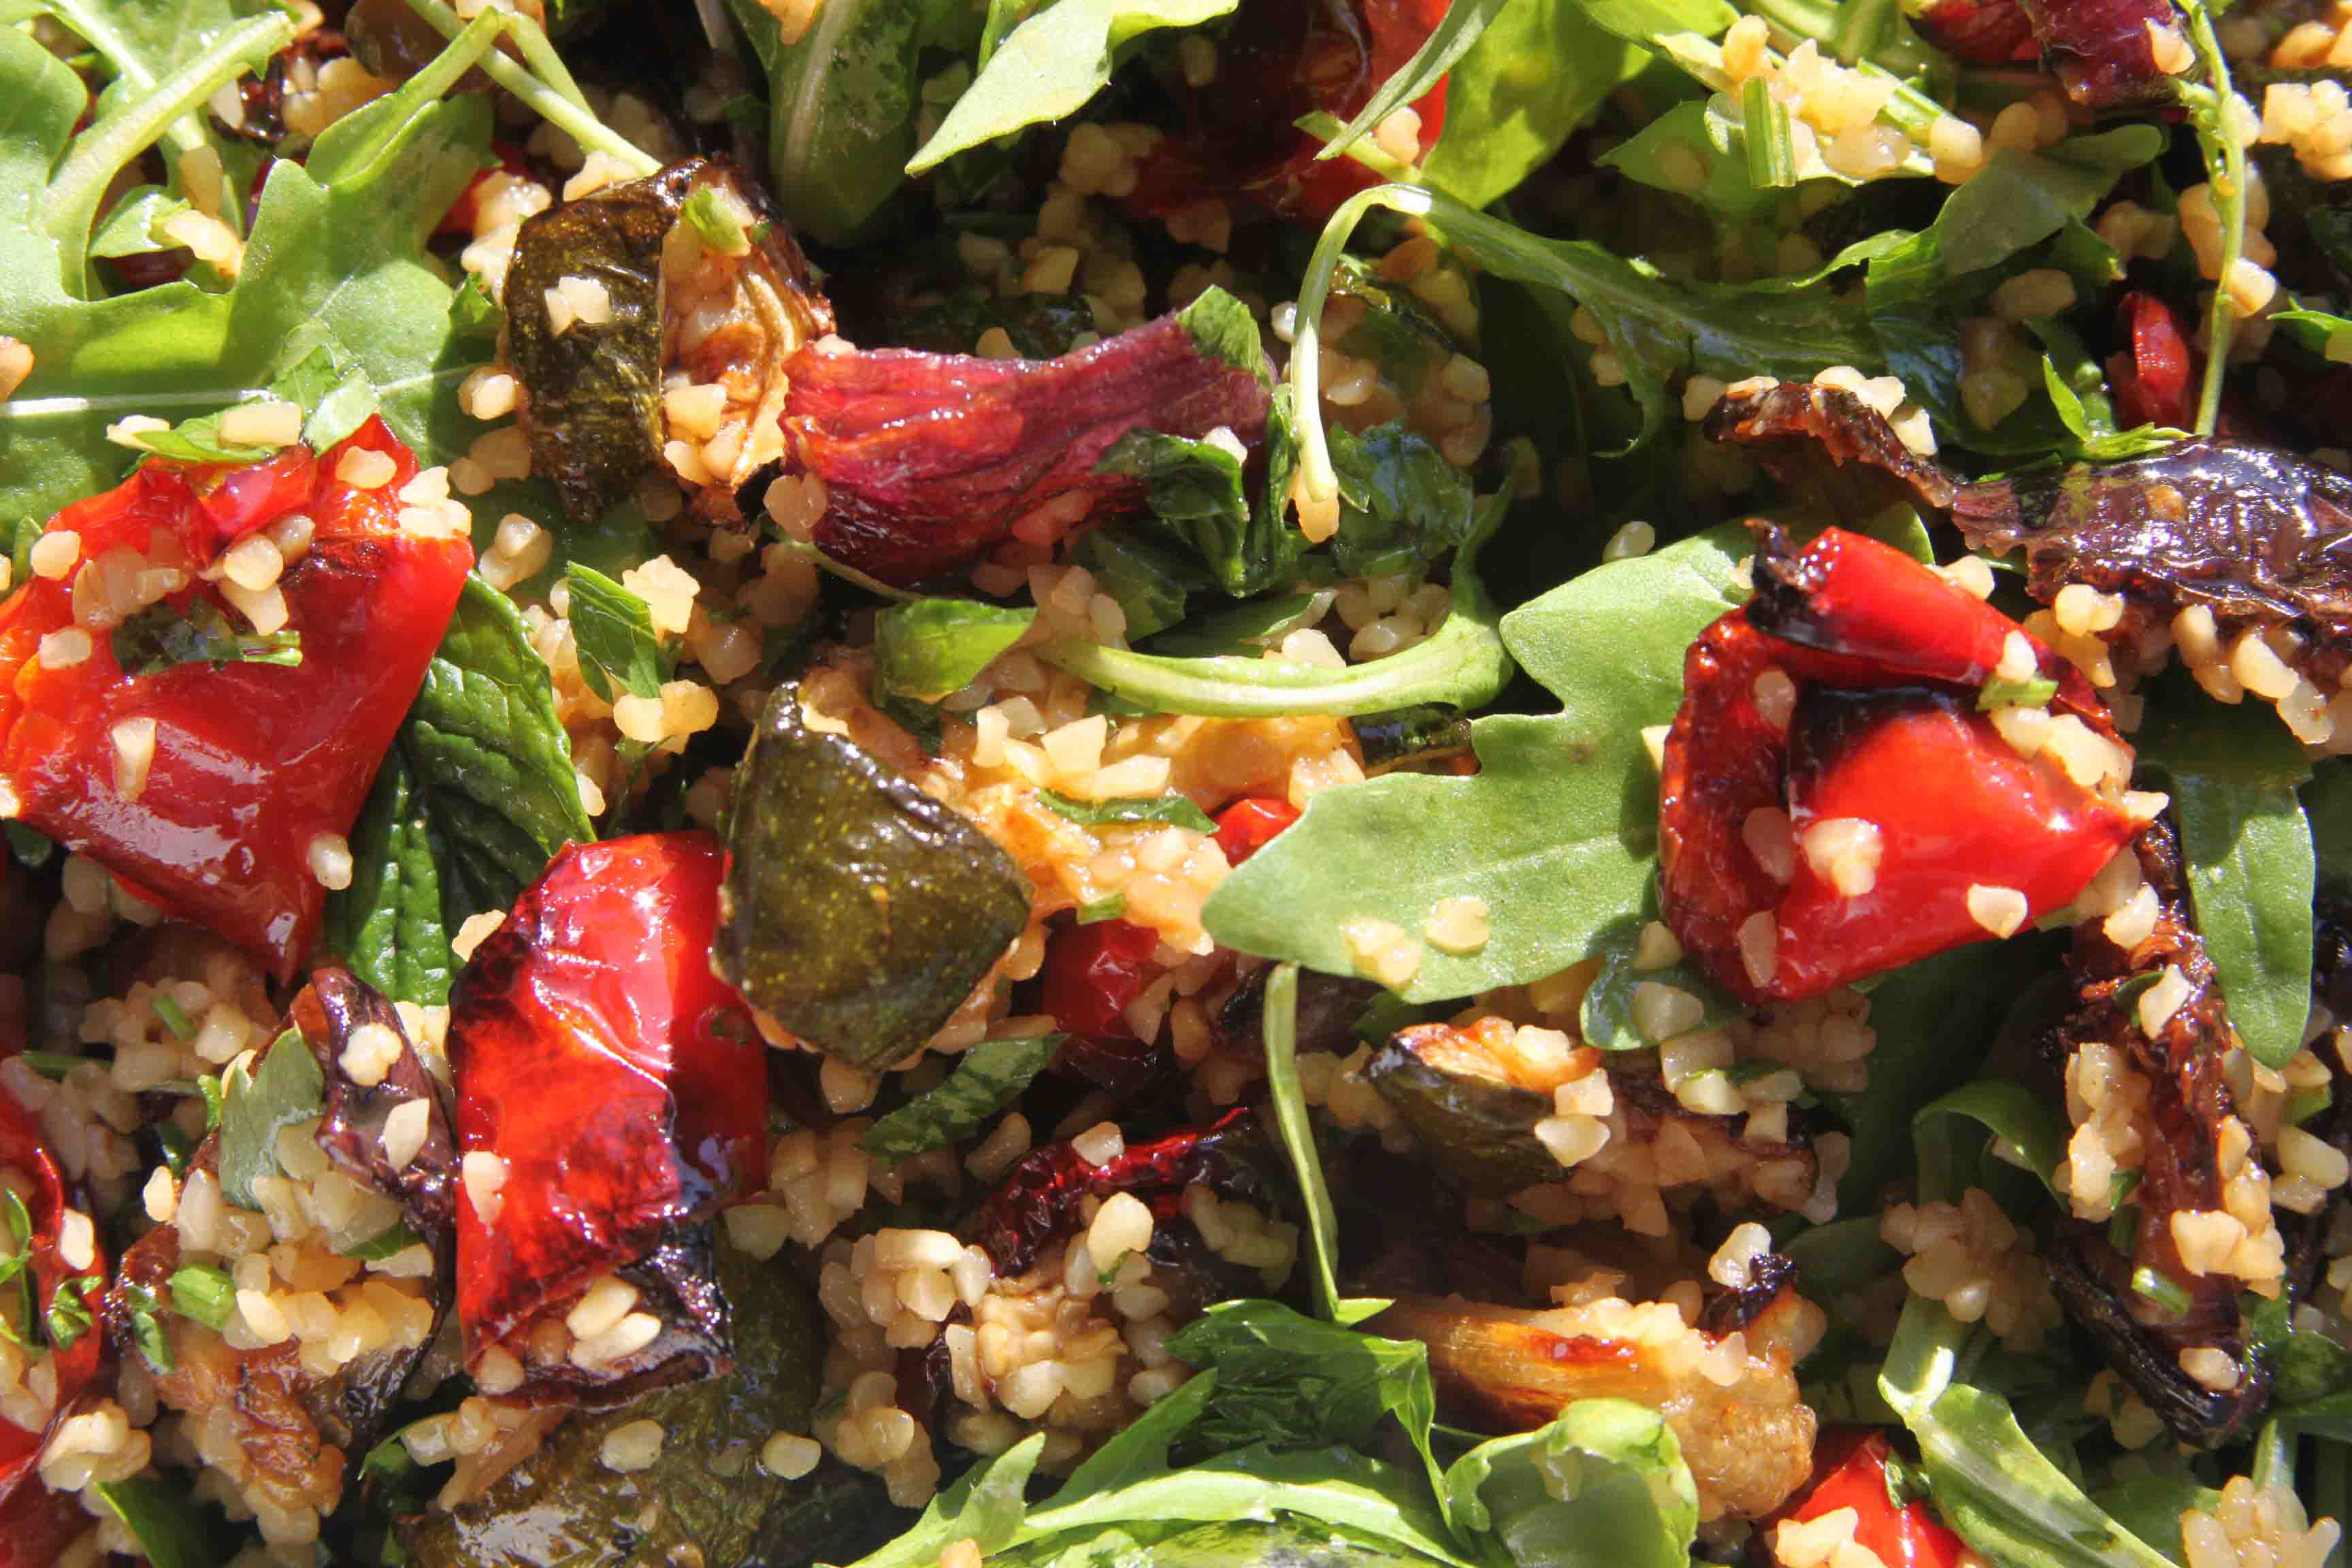
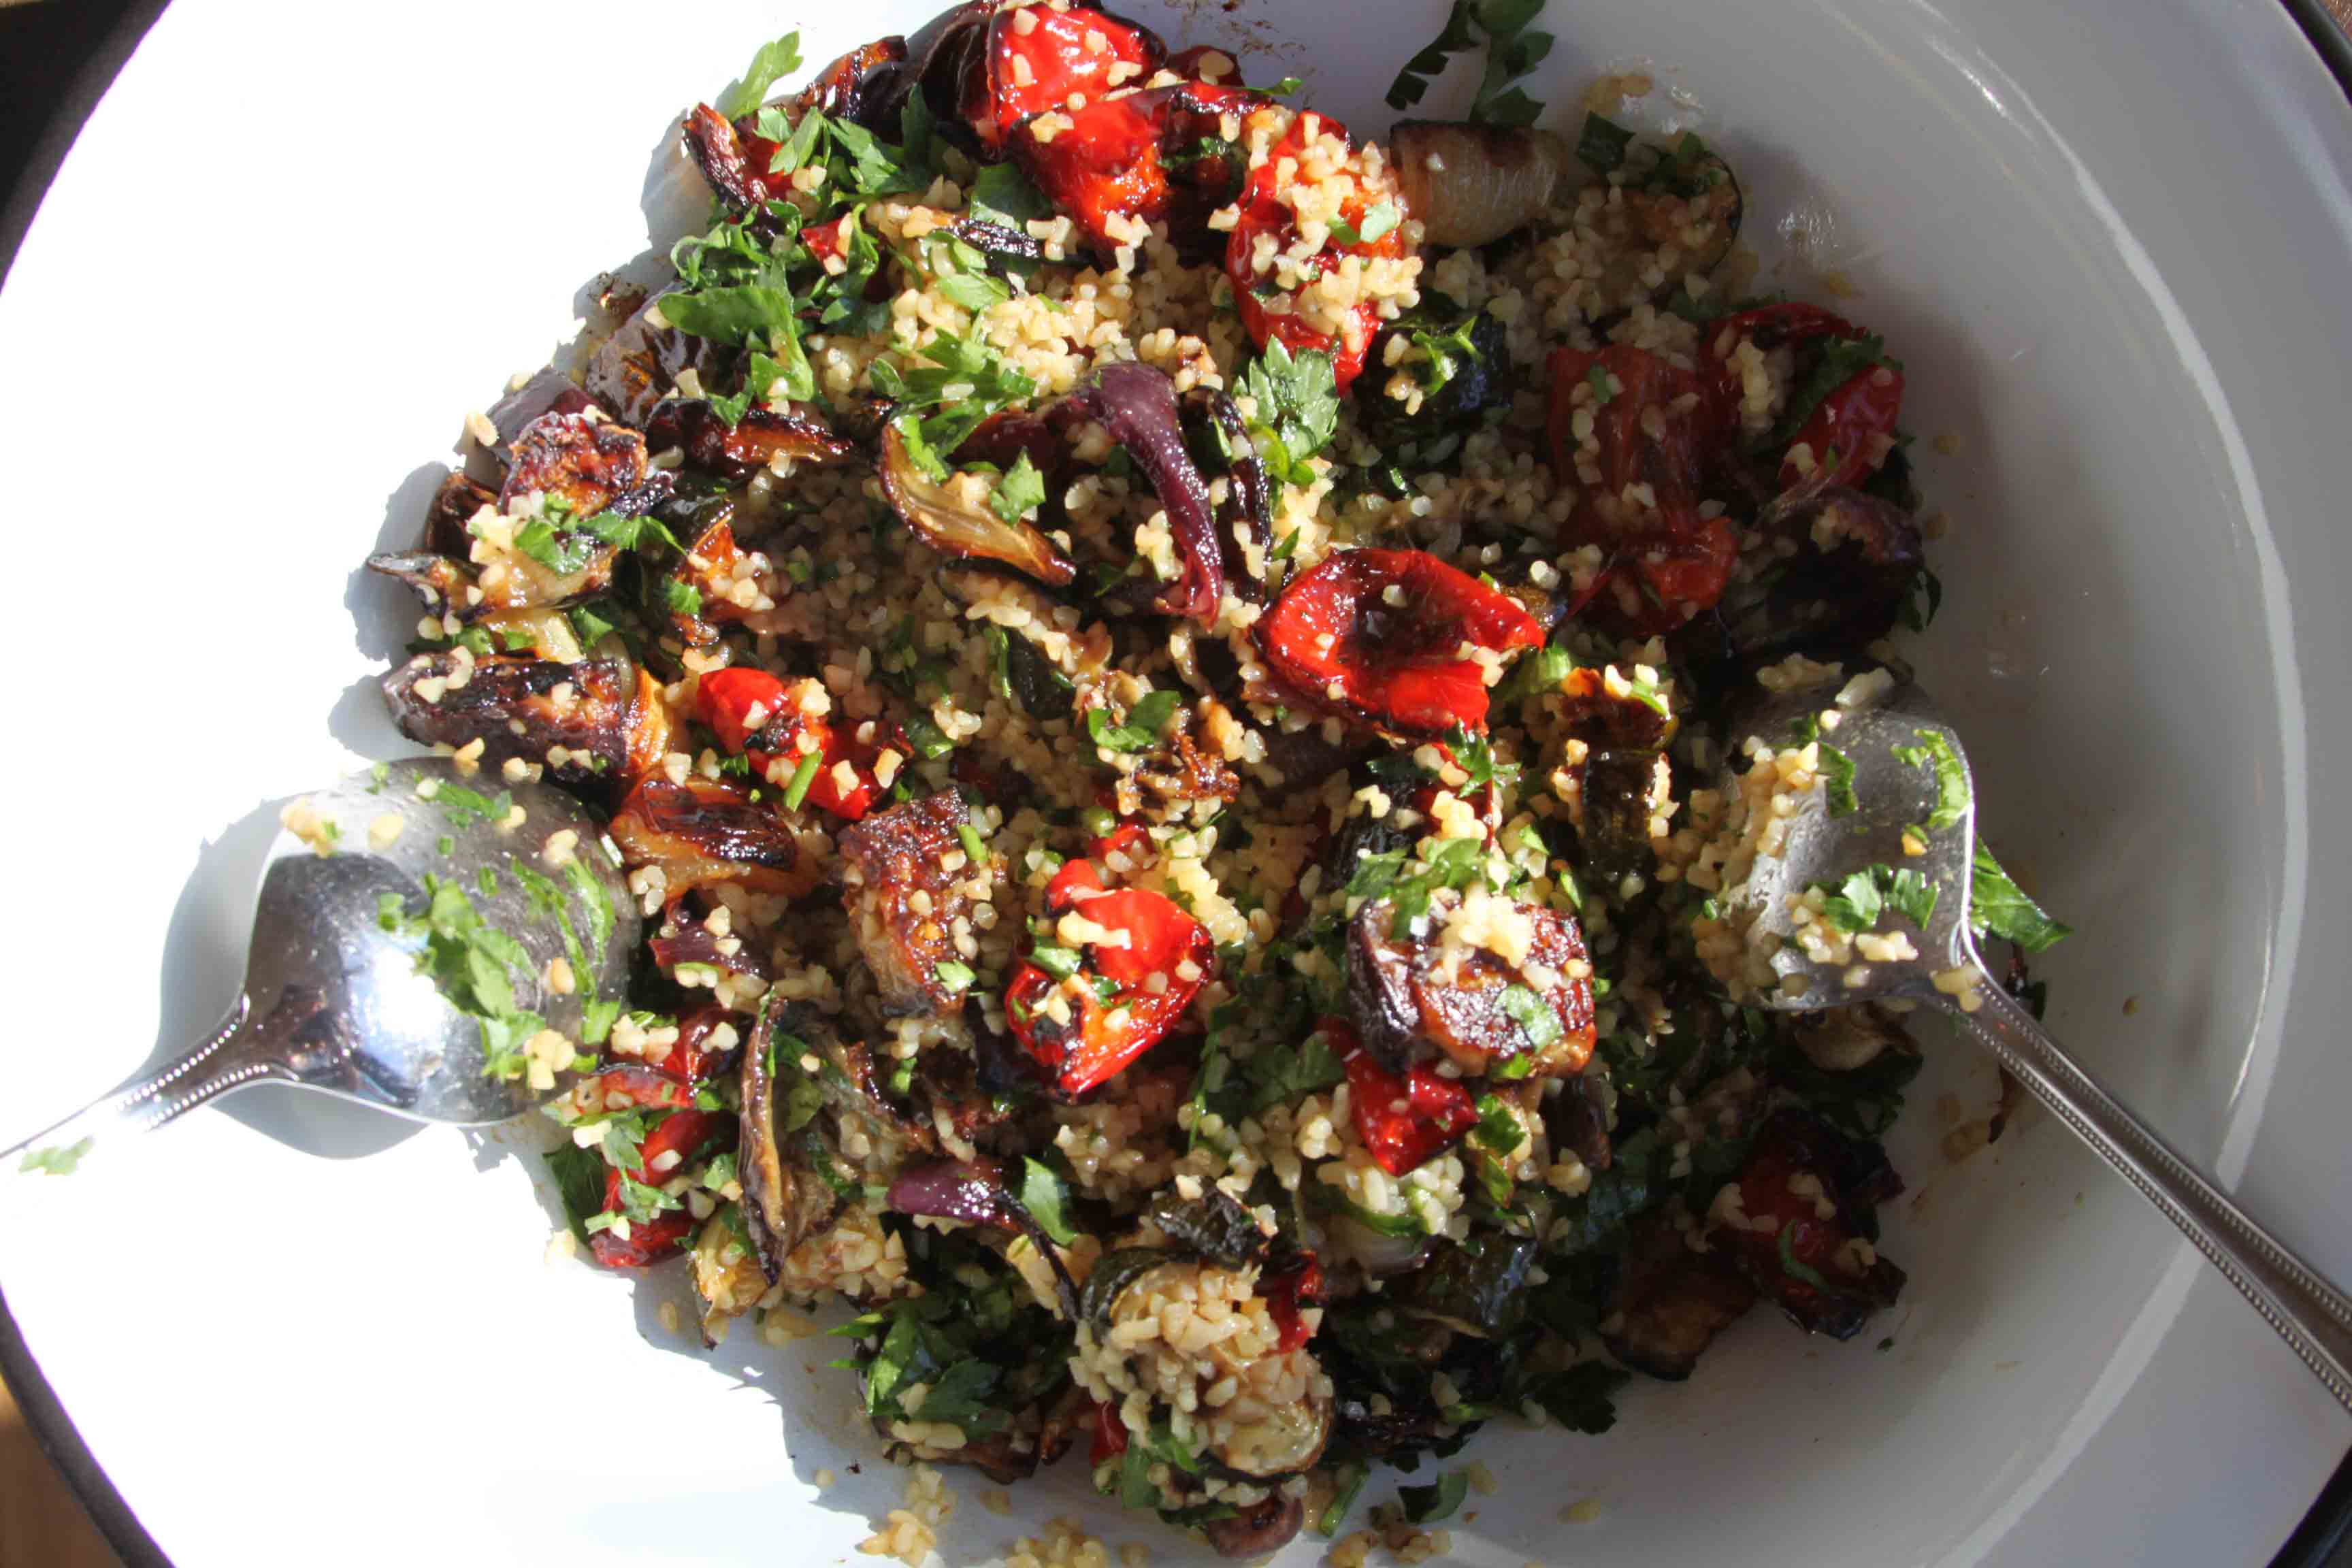
I used to make a salad like this all the time in the 90’s – I can see myself now, in the kitchen of my flat, Oasis blaring and a vat of Bulgarian Cabernet Sauvignon on stand by.  It was great then and I’ve made derivations of it ever since but I wanted to jazz it up a bit.  I roasted all the vegetables and made a dressing with olive oil and pomegranate molasses.  The fruity tang was just the thing to bring this up to date, both sharp and fruity and along with some crushed garlic made the perfect dressing.  I’m not very keen on couscous, it always seems a bit pappy and, for me anyway, still has a whiff of school semolina about it.  Bulgar wheat however has bite and texture so that is what I used.  Piles of fresh herbs, the mint being one of the few things the fat slugs haven’t scoffed in the garden, and some rocket completed the picture.

If I’d planned this earlier I would have made some labne, strained Greek yogurt which I could have blobbed over the salad but some garlicky regular yogurt was an excellent alternative.  I had forgotten how much I adore this salad, roasted, sweet and slightly charred vegetables, the nutty bulghar, masses of verdant herbs and the lip smacking dressing.  This would go down a storm with barbecued meat or fish but is substantial enough to have for lunch on its own.  Truly a winner, I will be making this all summer and beyond.  Back in couple of weeks!

Roasted Veg Salad

Roasted Vegetables with Bulghar and Pomegranate Molasses

The following vegetables are what I had but use an equivalent amount of whatever you like.  Should I be overwhelmed with courgettes later in the summer (if the slugs don’t eat those too) I will make this with those and perhaps throw in some feta and chives.

2 red peppers

1 aubergine

2 courgettes

3 onions

Olive oil

1 bunch parsley, chopped

1 bunch mint, chopped

2 large handfuls rocket

100g bulghar wheat

2 tablespoons extra virgin olive oil

1 tablespoon pomegranate molasses

1 clove garlic, peeled and crushed

Half a lemon

Preheat the oven to 200.  Chop the vegetables into small and similar size pieces, turn in some olive oil, put onto baking sheets and cook for about 30 minutes turning occasionally until soft and just catching at the edges.  Remove from the oven and leave to cool.  Put the bulghar wheat into a bowl with a pinch of salt and cover with boiling water to about 1cm above, leave to soak for 15 minutes then drain.  Mix the garlic, oil, pomegranate molasses and some salt and pepper to taste.  In a large  bowl, toss the vegetables, bulghar, herbs, rocket and dressing, stir to combine and have taste, a squeeze of lemon will probably be all you need.  Serves 2 on its own or 4 as an accompaniment.

Roasted Veg Salad 2


Vanilla Pannacotta with Blackcurrants

Vanilla pannacotta 2

I have been so lucky with piles of fabulous, fresh local fruit recently.  Blackcurrants, loganberries, strawberries, gooseberries and red currants.  We have had many of the classics such as gooseberry fool and some new ideas such as blackcurrant shortbread cake.  I made redcurrant jelly for the first time, pretty straightforward apart from my slightly Heath Robinson jelly bag of muslin suspended via a wooden spoon over a deep jug – it worked!  Blackcurrant jam and loganberry jam sit in my larder, a comforting site if ever I saw one.

After making the jam I had a few blackcurrants left over, maybe 100g, and this is what came to mind as a way of using them up.   They have such a huge and tangy flavour that only a little is required and I thought this gentle, creamy vanilla pannacotta the perfect way to show off the blackcurrant sauce.  Sweet and fruity, sharp and vanilla – these two flavours work so well together.

I have to admit to having avoided recipes containing gelatine for years.  I remember my mother once spilling a gelatine mixture on the floor and as she was in a rush, quickly put down some newspaper to soak it up.  The result was sheets of newspaper glued firmly to the flagstones which took some elaborate and extensive chipping away to remove.  To be fair this was powdered gelatine and I still rarely use that.  My preferred type is the clear almost glass like sheets which work a treat.   These little puddings are so easy and quick to prepare and always go down a storm.  I’ve finished the blackcurrants but we had the pannacottas again yesterday this time with chopped strawberries macerated in a little sugar until they were deep crimson and juicy – fabulous.

Vanilla Pannacotta with Blackcurrants

200ml whole milk

100ml single cream

100ml Greek yogurt

1/2 teaspoon vanilla paste

60g caster sugar

2 gelatine leaves

100g blackcurrants

20-40g caster sugar

Put the gelatine in a bowl of cold water to soften.  Heat the milk, cream, vanilla and sugar until it just reaches boiling point.  Remove from the heat and add the squeezed out gelatine, whisk well and leave to cool, stirring occasionally.  Whisk in the yogurt and divide between 4 ramekins or small metal moulds.  Put into the fridge for at least 4 hours to set.  Meanwhile put the blackcurrants into a pan with a splash of water and 20g sugar.  Heat gently until just falling apart and forming a syrupy sauce.  Carefully taste, you may need more sugar, it depends very much on their sweetness.  When you are happy with the balance leave the sauce to cool.  To serve, dip each ramekin briefly into hot water before turning out onto a plate and serve with the blackcurrants.  Serves 4.

Vanilla pannacotta


Children’s Cooking Class

Cooking class 2

I had to show you a picture of the girls who came over for a cooking class with me on Saturday.  It was such fun and they all cooked perfectly.  We made a plaited loaf similar to the milk loaf I wrote about last week, some little pasties filled with all sorts of delicious things and triple chocolate muffins.

It was a great morning and the reports came back that all the goodies were scoffed by grateful families before the end of the day.  Looking forward to the next one!

Cooking class 1


Milk Loaf, a really good white bread

Milk loaf

When I was a child we would often go to Kings Bakery in Ripon on a Saturday to buy a plaited milk loaf – it was my favourite bread and I loved going to this bakery with its in-one-door, out-the-other door shop.  The loaves were plaited beautifully, far better than I can ever achieve and tasted heavenly.  A slice on its own was delicious enough but spread with good butter thick enough to see your teeth marks in, aah I can still remember the taste.  Milk loaf is not as rich as brioche but is a step up from an ordinary white loaf and so whilst good for everyday still has a whisper of treat about it.  As this loaf was cooling from the oven I did the school run, on our return my children and I went into the garden and ate slice after slice with butter in the dappled sun, proper Famous Five stuff.

Please don’t think it a faff to do, bread is super easy to make and so rewarding, the only consideration is time.  If you want a loaf for lunch make it in the morning, want it for tea then make it right after lunch.  Once you have made the dough there are two risings of about an hour each and then baking for around 30 minutes so you are looking at around a total of 3 hours.  Panic not though, for most of that time the dough looks after itself whilst you do something else.

I love a good wholemeal loaf or chewy sourdough, they all have their place in my kitchen but I think the white loaf has fallen from fashion and been somewhat maligned, avoided.  This is the loaf to bring it back into the fold, fabulous as is and it makes superb toast too.  Have a go at making this, your family will love you for it and probably love making it with you too.

Milk loaf 2

Milk Loaf

I have some 10 to 12 year old girls coming over on Saturday for a cooking class and I though this loaf the perfect place to start.  What a treat to take home at the end of the morning and it gives us time to make plenty of other goodies during the rising times.

500g strong white bread flour

10g dried yeast

10g salt

1 tablespoon butter

1 tablespoon sugar

300ml milk plus a little extra

Warm the milk with the butter until just tepid and the butter melted.  Put the flour, yeast salt and sugar into a large bowl or the bowl of a freestanding mixer.  Add the milk, mix well and then knead for 8-10 minutes until smooth and springy.  Dust the inside of the bowl with some flour, put the ball of dough back in, cover with a tea towel and leave somewhere warm for 1 hour or so when it should be doubled in size.  Then knock the air out of it, knead briefly again and then divide into three and roll these three balls into sausages.  Squidge one set of ends together and plait the loaf then squidge the other ends together.  Put onto a baking tray which you have dusted with flour, cover again and leave for another hour.  Before this second hour is up preheat your oven to 200.  Brush with milk and then bake for 25-35 until golden and the loaf sounds hollow when you tap the bottom.