I can’t remember where this recipe first came from. I remember my Mother would make it, a classic for Saturday lunches but then I remember a friend of hers, Antoinette, also making it. Hardly a surprise they were both fans, utterly simply to make and from ingredients you may well have to hand. I like recipes with a smattering of nostalgia. Food has moved on so far from what I grew up with and these days we eat a range of cuisines that that child of the ’70’s would barely recognise. So, amidst the larbs and green curries, the free from cakes and oat milk flat whites I relish coming across those old friends from the past. Chilli and Spag Bol, Rhubarb crumble and toad in the hole. All these are classics for a reason and welcome at my table anytime.
So it is with this tart. Four ingredients, yes just four ingredients and you have a top lunch with a surprisingly satisfying flavour combination. Sweet tomatoes with savoury cheese atop the tang of mustard and crispy pastry – come on, you know its going to taste good.
Warm with a salad for lunch, perhaps along side some other bits and pieces, soup, good bread, olive etc – that sort of picnic arrangement that always looks such a feast on the table. It is also good cold and has even made it into the odd packed lunch. A winner.
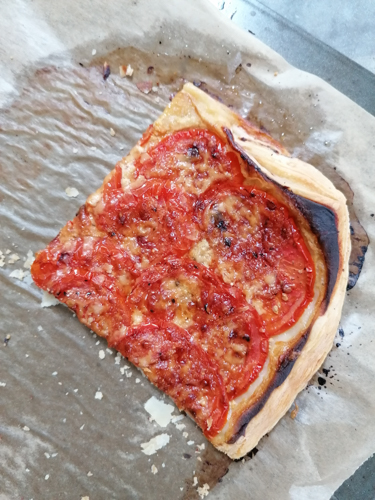
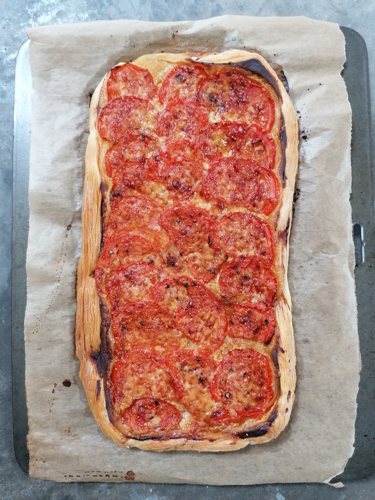
Tomato, cheese and mustard tart
As is my way I have tried various additions, slow cooked onions and peppers with the tomatoes, different cheeses etc but whilst delicious, those things are for another day, another tart. This one shines with the simplicity and harmony of the three toppings.
1/2 a 500g puff pastry
2 tablespoons dijon mustard
3 good size tomatoes, core removed and sliced
100g strong cheddar, grated
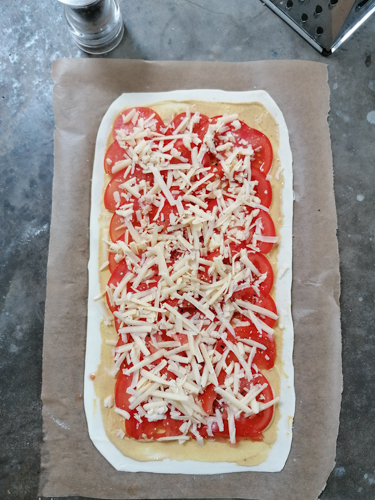
Preheat the oven to 200 and put a baking sheet in to heat. Roll out the pastry on a piece of parchment to a rectangle about the thickness of a pound coin. Spread with the mustard not quite to the edge and then layer the tomatoes on top. Season well and then sprinkle over the cheese avoiding the edges. Transfer the pastry on the parchment onto the hot baking sheet and cook for 20 minutes at 200 and then lower the oven to 180 for a further 10-15 minutes. After this time the pastry underneath should be bronzed and super crisp. Allow to sit for five minutes before serving, enough for 2 as it is or 4 alongside other things.