Fruit and seed flapjacks (but not really a flapjack)

I didn’t have a sweet tooth before I had children.  During my working years I could happily keep a packet of chocolate buttons in my desk drawer for weeks only tucking into one or two per day.   Now I am pretty much Olympic standard when it comes to polishing off a bar of chocolate.  I give up chocolate each year for Lent but even then have a couple of caveats.  The first is that I am giving it up solely in the form of confectionary – should someone present me with a chocolate pudding, I would, in the name of courtesy, not dream of turning in down.  Equally when I am judging – for those unaware, I am a food judge – I am required to taste everything put in front of me.

So this abstinence for what always feels like a very long 40 days means I am regularly to be found scrabbling around my cupboards looking for something sweet after lunch or supper.  Thus I have arrived at these kind-of-flapjacks.  Actually they are more of granola / muesli / fruit and seed bar but those sound new fangled and anything containing oats which is baked and cut into bars feels like a flapjack to me.  I have tried many permutations trying to reduce sugar in any form and have ended up here.

These are miles away from the delicious, but slump inducing, traditional flapjacks (for which there is a recipe here October 2013).  The version below is packed with good stuff, oats, seeds and dried fruit along with a banana – some sugar and honey yes but I have tinkered with this recipe reducing the sugar each time so once you divide it up, well, it isn’t so bad and these are a treat after all.  Perfect for a packed lunch or a picnic and useful to have in a tin for when you find yourself turning out a cupboard searching for chocolate.

As with most of my recipes there is room for manoeuvre and you can use the dried fruits you have in the cupboard, same with the seeds.  You can even use a handful of nuts in place of some of the seeds, just keep the weights in line with those I suggest below.  Finally, its worth mentioning that these are by no means just for Lent, tuck into them any day of the year you want.

Fruit and seed flapjacks

75g butter

80g soft brown sugar

60g honey

200g oats

150g dried fruit, I use dried cranberries, sultanas and chopped apricots

150g seeds, I use sunflower seeds, pumpkin seeds and sesame seeds

I ripe banana, mashed

Preheat the oven to 160C and line a 20cm square tin.  Melt the butter in a pan with the sugar, honey and a pinch of salt.  Put the oats, dried fruit and seeds in a bowl and mix.  Add the melted butter and sugar to the bowl, mix well then add the mashed banana and mix again.  Put into the prepared pan, press down lightly, level the top and bake for 30 – 40 minutes until just bronzed on top.  Leave to cool and then cut into squares or bars.


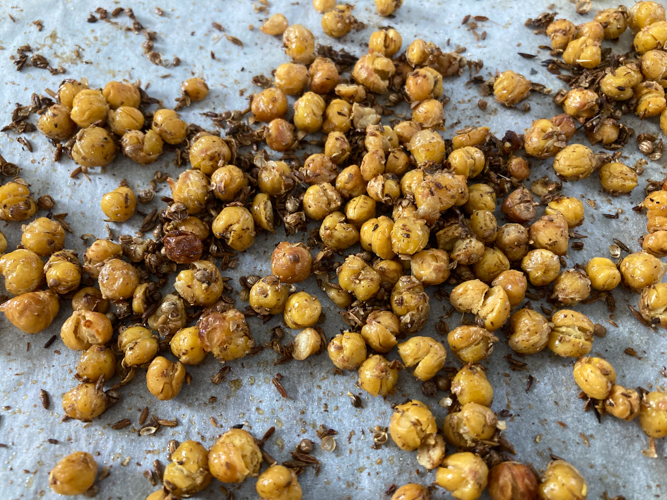
Crispy spiced chickpeas (for snacks or for salads)

I relish that end of the day wind down and particularly at this time of year try to persuade my family to assemble outside if it’s warm, to catch up and enjoy a drink.  Often this is only possible at weekends and even then one or other child is often out but still, it is something I look forward to whether we are in the garden or installed in front of a cosy fire.

With a drink I always, rather greedily, look forward to the accompanying snacks.  Although I won’t turn down a crisp, there are other things I turn to which seem more delicious and rather less greasy.  The most important ingredient though is a touch of salt which somehow defines ‘snacks with drinks’.  It can be as simple as a bowl of olives, briny and savoury or a hunk of parmesan cut into gritty shards – unbelievably moreish and of course ridiculously simple.  The spicy seeds which you will find here (November 2018) make a regular outing and these savoury, crunchy chickpeas have also become a fixture over the years.  You can customise them with whichever spices you favour, I tend to fall back on this classic combination and then add as much or little chilli as I think will go down well.  Sometimes I will make a batch of these or the spicy seeds and put into little bags or jars as presents, none turned down yet.  The chickpeas are fabulous on a salad, we tucked into one this week with masses of grilled courgettes, roast cherry tomatoes and squeaky green beans as this is what needed using up from the garden – it was a stellar combination, though I say it myself.

Chick peas are an absolute star to keep in the store cupboard, an essential in my book.  You can add them to a stew like the chorizo one (September 2013) cook them with potatoes (May 2014) or chicken (March 2015) and of course make an earthy, garlicky hummus.  Or simply open a can and make these.

Crispy spiced chickpeas

Use whichever spices you feel like and you can use ground ones if that is what’s available.  I like to use seeds because the flavour seems more vibrant and of course you get the added bits of crunchy seed alongside the chickpeas which are delicious.

1 tin of chickpeas, drained

1 tablespoon olive oil

Sea salt

1/2 tablespoon coriander seeds

1/2 tablespoon cumin seeds

Dried chilli flakes (optional)

Preheat the oven to 200 and line a baking tray with parchment.  Tip the drained chickpeas onto a tea towel, fold it over to enclose them and gently roll the chickpeas around.  This will both dry them and remove the skins which you can discard.  Once the chickpeas are dry put them into the lined tin and add the olive oil.  Turn until coated then cook for 15 minutes.  Meanwhile heat the spices in a dry frying pan until fragrant and popping then grind in a mortar.  After the 15 minutes are up remove the chickpeas from the oven, add the spices and a good pinch of salt, mix well then return to the oven for a further 5-7 minutes until just beginning to bronze.  Leave to cool then tuck in or scatter over a salad.


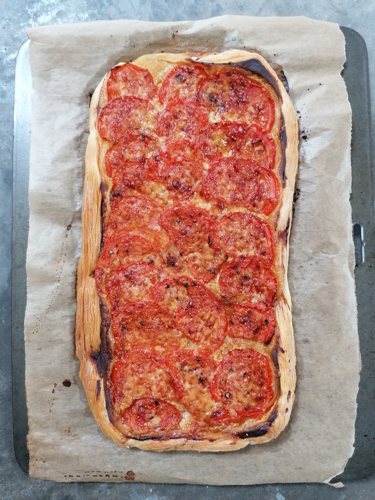
Tomato, cheese and mustard tart


I can’t remember where this recipe first came from.  I remember my Mother would make it, a classic for Saturday lunches but then I remember a friend of hers, Antoinette, also making it.  Hardly a surprise they were both fans, utterly simply to make and from ingredients you may well have to hand.  I like recipes with a smattering of nostalgia.  Food has moved on so far from what I grew up with and these days we eat a range of cuisines that that child of the ’70’s would barely recognise.  So, amidst the larbs and green curries, the free from cakes and oat milk flat whites I relish coming across those old friends from the past.  Chilli and Spag Bol, Rhubarb crumble and toad in the hole.  All these are classics for a reason and welcome at my table anytime.

So it is with this tart.  Four ingredients, yes just four ingredients and you have a top lunch with a surprisingly satisfying flavour combination.   Sweet tomatoes with savoury cheese atop the tang of mustard and crispy pastry – come on, you know its going to taste good.

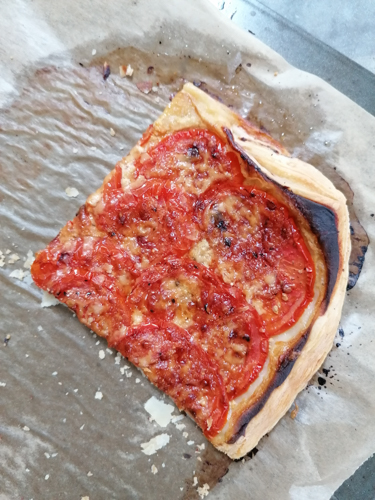
Warm with a salad for lunch, perhaps along side some other bits and pieces, soup, good bread, olive etc – that sort of picnic arrangement that always looks such a feast on the table.  It is also good cold and has even made it into the odd packed lunch.  A winner.

Tomato, cheese and mustard tart

As is my way I have tried various additions, slow cooked onions and peppers with the tomatoes, different cheeses etc but whilst delicious, those things are for another day, another tart.  This one shines with the simplicity and harmony of the three toppings.

1/2 a 500g puff pastry

2 tablespoons dijon mustard

3 good size tomatoes, core removed and sliced

100g strong cheddar, grated

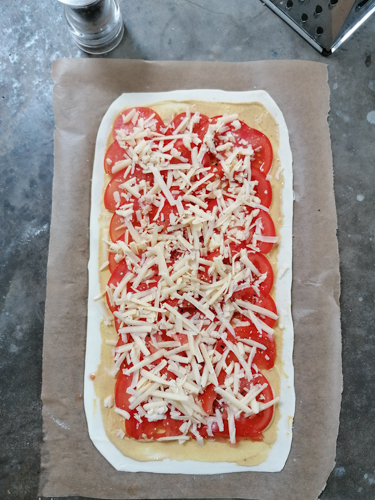
Preheat the oven to 200 and put a baking sheet in to heat.  Roll out the pastry on a piece of parchment to a rectangle about the thickness of a pound coin.  Spread with the mustard not quite to the edge and then layer the tomatoes on top.  Season well and then sprinkle over the cheese avoiding the edges.  Transfer the pastry on the parchment onto the hot baking sheet and cook for 20 minutes at 200 and then lower the oven to 180 for a further 10-15 minutes.  After this time the pastry underneath should be bronzed and super crisp.  Allow to sit for five minutes before serving, enough for 2 as it is or 4 alongside other things.


Baked feta with chilli and herbs (or olives)


Tapas, mezze, picnic, however you refer to this style of eating I loved putting a load of different dishes on the table to pick at. Whether as lunch itself or simply a couple of things to whet the appetite before the main event.   You will find many such recipes on these pages Cheese Gougeres (November 2016), Moutabal (February 2017), Artichoke Crostini (March 2013), Grissini with Rosemary (May 2015) are a few.  More often than not the little plates I serve are vegetarian and it has often been a good way to entice my children to try something different.  Rather than being faced with an entire supper of something new and unfamiliar – this is an opportunity for them to try something whilst knowing there is a myriad of old favourites to tuck into at the same time.

I am a little ambivalent about feta.  If it is mild I am happy to tuck in, enjoying its salty edge.  Too strong or mature however and it ventures into that hirsute, goaty thing that I struggle with.  In this recipe use whichever type of feta you prefer – you can even find feta style cheese now that only contains cow’s milk.

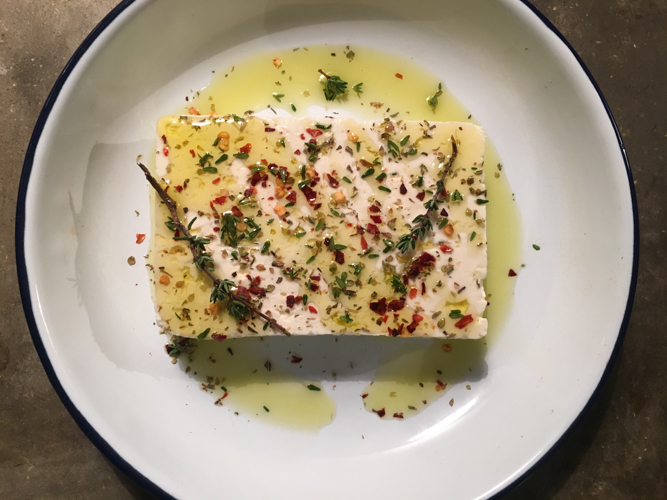
This baked feta graced our table on Saturday evening amongst some other goodies.  I served it with homemade little tortilla chips (don’t panic the chips are homemade not the tortillas – find the recipe in Girls’ Night In, February 2014) and this was the first empty plate, it literally disappeared before my eyes. Warm, soft, salty with a bite from the chilli – this could be one of the most moreish things I have eaten.

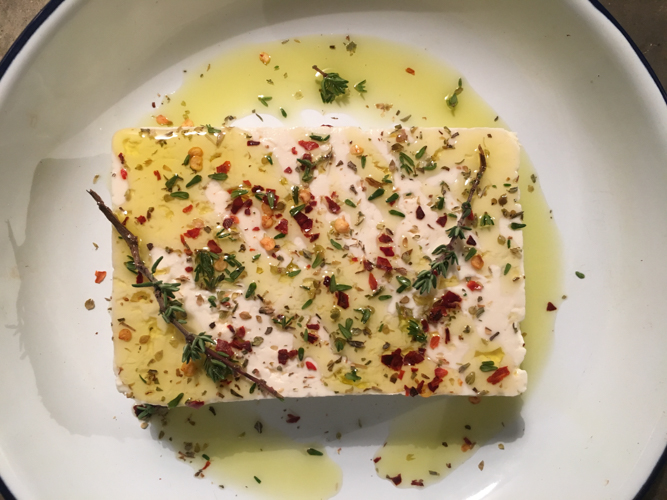
Now this is a winning get out of jail free card if you need a last minute canapé or snack to go with drinks.  The warm soft feta has a completely different character to the cool white chunks more familiarly seen in Greek salads.  It takes on a delicate squidge that is enormously inviting and along with some chilli flakes and a sprinkling of herbs is the perfect mouthful to scoop onto a pita or tortilla chip. Packs of feta last for ages in the fridge and along with some hardy herbs you may have weathering the winter storms and chilli flakes in your cupboard you are all set.  Sometimes I add olives to the dish before baking, it depends whether I have any to hand and its very good either way.

Feta with Chilli and Herbs (or Olives)

The ingredients that follow are what I tend to have on hand and therefore what makes this a store cupboard saviour.  You can use chopped fresh chilli if you prefer and even pickled chillis for a different but very delicious vibe.

200g pack of feta

1/4 – 1/2 teaspoon dried chilli flakes, depending on how hot you like

A couple of sprigs of fresh thyme

25g black or green olives, pitted (optional)

Olive oil

Preheat the oven to 200.  Put the feta in a small ovenproof dish, sprinkle over the chilli and thyme, drizzle with oil and add the olives if you are using them.  Bake in the oven for 15-20 minutes until soft but not collapsing.  Serve with homemade pita chips, tortilla chips or whatever you like.


Olive, thyme and chilli soda bread

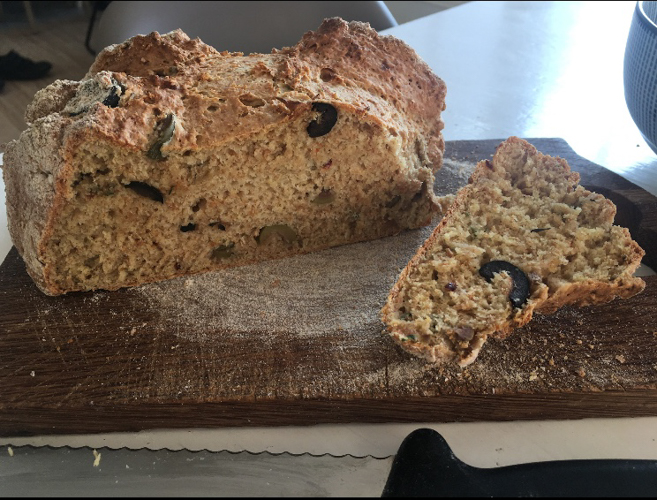
I made this recently to put out before lunch when friends came over and it was gone in minutes.  Served with a garlicky courgette dip it was just the ticket with some pre lunch drinks and kept the children more than happy.  As luck would have it this takes minutes to make and as such is something I regularly turn to.  Although I love making all kinds of bread and make a loaf of white or sourdough weekly, this is a great one to have up your sleeve when the clock is ticking and there is no time for proving and rising.

Whilst I might not have buttermilk in the fridge at all times, I always have yogurt to hand.  This, let down with a bit of milk, works a treat in place of buttermilk and means a loaf of this moreish bread is never more than about half an hour away.   My daughter adores olives and chilli so can polish off half of this loaf without thinking and it takes the sting out of the veggie soup or salad that often accompanies it.

Essentially a riff on my seedy soda bread, April 2013, I add some punchy flavours to this one.  The chilli is up to you but I think it works a treat with the olives and thyme.  There is a thyme plant outside the kitchen that manages to soldier on whatever the weather so along with some store cupboard olives this one is always a contender for lunch or supper.   Or serve as I did at the weekend with a dip, a herby labneh perhaps or hummus and you will have happy faces all round.

Olive, thyme and chilli soda bread

I make this with a mix of wholemeal and regular white flour but you can go with all white if you prefer or if that is what you have.  Buttermilk sometimes comes in 284ml tubs for some reason so just make this up to 300ml with milk.  If you are using yogurt, use 200ml and make it up to 300ml with milk.

150g wholemeal flour, plus a bit extra

150g plain flour

1 teaspoon fine salt

1 teaspoon bicarbonate of soda

2 teaspoons soft brown sugar

300ml tub buttermilk (or yogurt, see introduction)

50g olives, I like a mix of green and black, chopped up a bit

1 teaspoon thyme, leaves only

1/2 teaspoon chilli (omit this if you like)

Preheat the oven to 200.  Put the flours, salt, bicarb, sugar, olives, thyme and chilli in a large bowl and mix.  Add the buttermilk and give it a good mix together.  Sprinkle some wholemeal flour on a baking sheet, make the dough into a ball, put on the tin, sprinkle a little more flour over and cut a cross in the top with a sharp knife.  Bake for 30-35 minutes until crusty, golden brown and sounds hollow when you tap the bottom.


Spicy Seeds

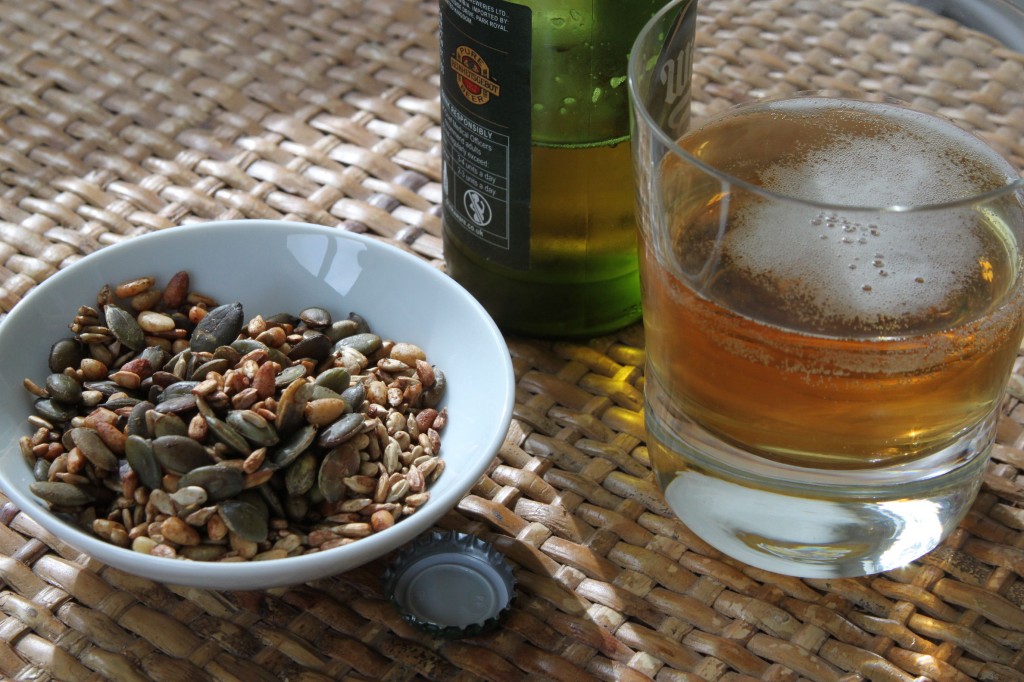
Drinks, cocktails, aperitifs – whatever you want to call them there is something rather civilised about relaxing with a good drink as the sun sets over the yardarm.   Ice clinking against glass heralds the end of the working day and whether you are in some top notch bar or your own kitchen there is nothing wrong with making the most of it.  Along with a delicious drink I like something to nibble at the same time.  Not necessarily as elaborate as canapés (not on a school night, come on) but certainly a little salty treat to savour.  Crisps can get a little greasy and nuts we tend to avoid as my daughter is allergic to them.  These seeds tick every box and prove a winner whenever I whip them up.

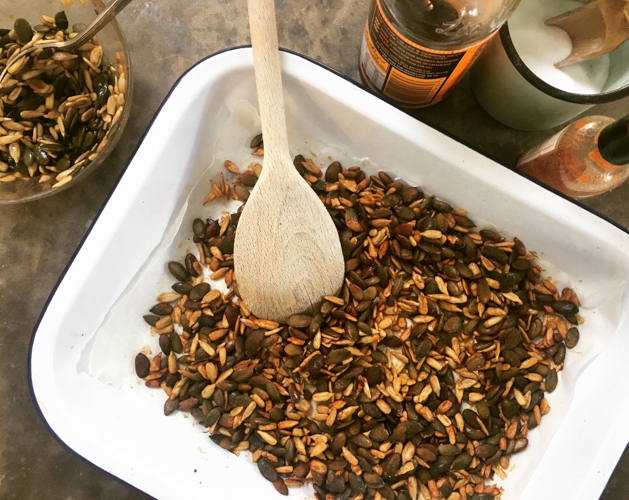
This isn’t the first time I’ve mentioned these utterly moreish seeds but I thought they deserved another shout out.  So much better for you than crisps, this spicy snack is made in a matter of minutes and can be as spicy (or not) as you like.  I often put a bowl of these out before lunch or supper and they go in a flash, the tangy heat seems irresistable.

A great addition to a salad or to top off a bowl of hearty soup, these are properly useful to have in a jar in the kitchen.  Fill little cellophane bags with them and give to friends.  With a suitably festive ribbon these make a great Christmas present particularly if you are getting a little hamper together which I sometimes do.

Spicy Seeds

60g sunflower seeds

60g pumpkin seeds

30g pine kernels

1 tablespoon Worcester sauce

1/2 teaspoon Tabasco

Sea salt

Mix everything together and spread in a single layer on a baking sheet.  Bake for 5-6 minutes at 200, leave to cool briefly before adding a tiny sprinkle of salt and digging in.