Red cabbage, radish and herb salad

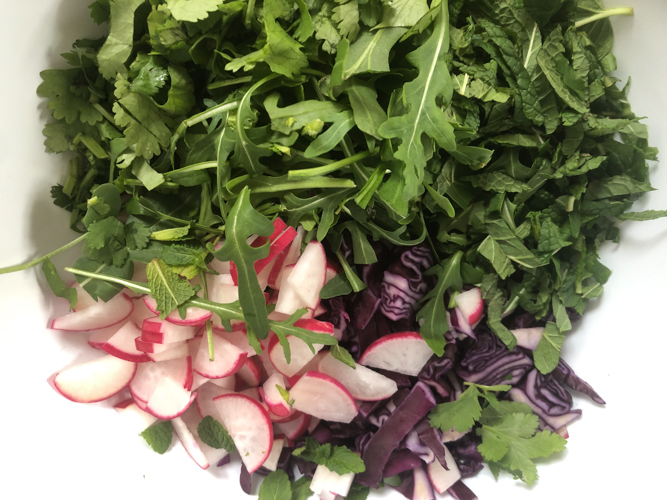
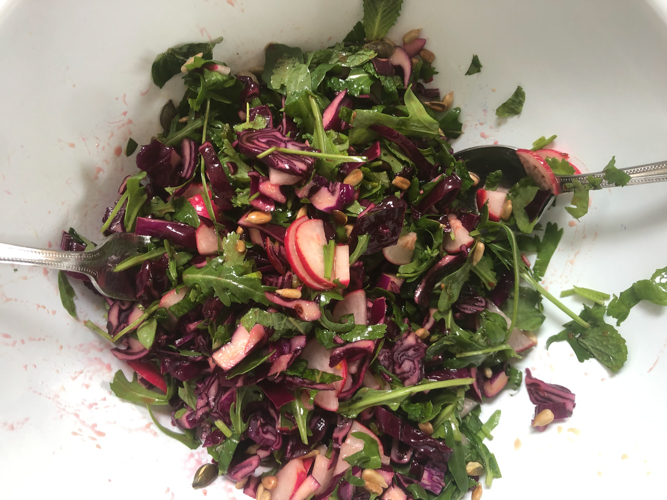
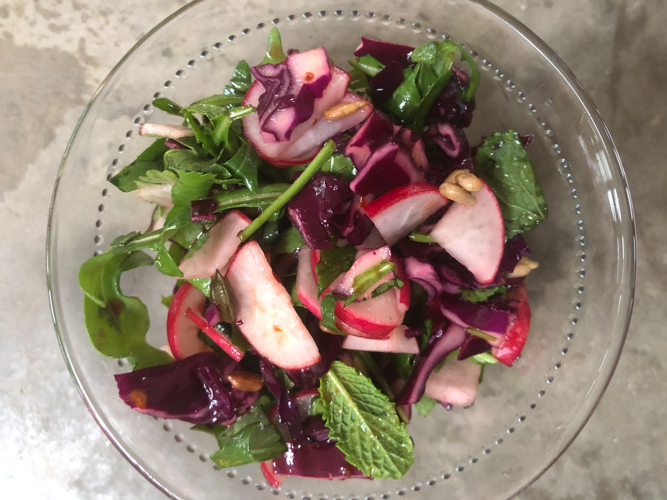
Here is a blast of colour to brighten your January day.  Not only is this salad glorious to look at it also tastes fabulous.   Crunchy raw veg always feels like it is doing us good but can, on occasion, be hard work to chomp through.  This however is an absolute joy to eat with its tangy, sweet and sour dressing and handfuls of herbs alongside the crunch of the radishes and cabbage.

I have mentioned before my aversion to stringent diets, casting aside any of the food groups or making January a form of penitence to salve our conscience following the season of plenty.   Food should be a pleasure, a treat to look forward to everyday and even if you are hoping to shake off a couple of pounds there is no reason why breakfast, lunch and supper shouldn’t be a feast.   You will find plenty of salads amongst my posts, not just leafy green ones although I won’t have a word said against my Favourite Green Salad (January 2014) but ones jammed with other ingredients full of crunch and flavour, freshness and colour.  Try the Thai-ish salad (November 2015), Roast Aubergine, Feta and Mint (July 2015), the Blood Orange, Beetroot and Feta (January 2014) or maybe the Celeriac Remoulade (January 2016) to which I quite like to add some sharp, crunchy apple if the mood takes me.

In short raw veggies are a great way to get yourself back on track.  You are eating healthily whilst tucking into something delicious – win, win.  I can’t recommend this one enough, I got the idea for the reduced dressing from an Ottolenghi salad and then tinkered around until I had this.  Easy and quick it always goes down a treat and that belt of pink, green and magenta goes a long way to lifting spirits on a dreary, grey day.

Red cabbage, radish and herb salad

1/4 red cabbage, finely chopped

10 radishes sliced

20g (a big handful) rocket

20g mint

20g coriander

50ml lime juice (roughly 2 limes)

2 tablespoons maple syrup

1/4 teaspoon chilli flakes

1 tablespoon soy sauce

2 tablespoons light olive or sunflower oil

Toasted sunflower and pumpkin seeds, a handful (optional)

Heat the lime juice, maple syrup, chilli flakes and soy in a small pan until syrupy then add the oil, mix well and leave to cool.  When you are ready to serve roughly chop the rocket, mint and coriander then mix together with the cabbage and radishes in a bowl along with the dressing.  Sprinkle with the seeds if you are using them.  Serves 2 for lunch or 4 as a side.


Between Christmas and New Year

We are nearing the end of that hazy week between Christmas and New Year.  The week when you are unsure which day it is and on occasion which year.  I dither between hanging on to the festive season and continuing to think a mince pie for breakfast a good idea and diving headlong into the good intentions of the New Year.

I rather look forward to January.  Like opening a brand new exercise book at school I relish that clean fresh page.  Although I don’t believe in weighing yourself down with stringent resolutions there is no harm in a shift towards anything that makes you feel good about life.  Whether that is a bracing walk in the fresh air, a crazily invigorating dip in the sea or simply giving the Prosecco a break is up to you.

For us the easy going, day sliding from one to another vibe continues until term starts.  Until then we are lying on the sofa watching telly, finishing those chocolates, going for walks and reading our Christmas books.

Whatever you are doing for New Years Eve have fun, treat yourself and look forward to that crisp white page of your 2020 exercise book.  Happy New Year.


Chocolate and Peppermint Bark

There is a fizzle of excitement in the air.  The boxes of decorations in the attic are waking from their hibernation, the lists are itching to be made and the dodgy old seasonal playlist is at the ready.  We are in the countdown.  Christmas is on its way.

I say on its way but I’ve already held two of my Christmas cooking demo’s, the last one is a week away.  These are always such fun with a valuable exchange of Christmas top tips and ideas from the assembled along with all my suggestions of things to cook, presents to give, goods for your hampers and general festive chit chat.

I make no secret of my love for this build up.  Dare I say it, the anticipation and weeks before the big Ho Ho Ho are often the most fun.  Don’t get me wrong, I am no bah humbug and love Christmas Day itself, the excuse for a cocktail early in the day, the possibility of a new cook book, paper hats at a rakish tilt and all the bonhomie that comes from being with loved ones (and possibly from that 11am cocktail).

So back to the anticipation which goes hand in hand with the list making and wrapping.  First on the list are the spiced cherries in bacon which need to be soaked.  Possibly the craziest canapé recipe you will ever come across but surely one of the easiest and most delicious. You will find it along with other get ahead tips in my November 2013 post.  The longer the cherries languish in their Worcester sauce bath the better.

Secondly get those roast potatoes for the big day by getting them in the freezer now.  You’ll find details in the 2013 post mentioned above but essentially parboil them, give ’em a good shake and flat freeze before tumbling into a bag or tub for storage in the freezer.  On the day put them into a pan with hot oil and roast as usual.  This saves peeling a mountain of potatoes on Christmas Eve and then finding somewhere to put them, followed by boiling a vat of water the next day so your mascara clumps as you lean into the steam to check them.   Win win.

Christmas Biscotti, which I made a ton of last year for Christmas hampers (54 since you ask) is another treat to get under your belt (literally as well as figuratively). It lasts for ages, tastes delicious and is an absolute winner to give as a present, tied with a little red and white bow.

I would also recommend whipping up some Gougeres (November 2016) – little light and airy balls of cheesy fabulousness that I couldn’t countenance Christmas Eve evening without.  Easy to make, just a little heating and mixing and no reason to get out your piping bag unless you enjoy that sort of thing, two teaspoons will suffice.  These are another perfect canapé which freeze and reheat like a dream.

I won’t repeat all my other get ahead tips here as they are easily found on these pages but what I will reiterate is the calm, happiness and relief I feel knowing I have done as much as possible before Christmas really starts (ie a freezer and larder full of goodies to tuck into).  A couple of times when we have been a smaller gathering I haven’t thought it necessary to do so much ahead of time.  Believe me, it was and I won’t slip up again.  Never underestimate how many other things you would rather do on Christmas day than roll out pastry for some sausage rolls…..

This is a proper little treat that couldn’t be more Christmassy.  As a child the only candy canes I saw were those in the book Eloise at Christmas, I thought they were glorious and envied all our American cousins whom I imagined nibbling candy canes throughout the holidays.  Easily available here, they always shout Christmas loud and clear and this is my favourite way to eat them.   Although if this bark appeals you could always try my Chocolate Peppermint tart (December 2014), just saying….

Chocolate and candy cane bark

Ok so you can make as much or as little as you like.  The amounts below make a bar roughly 12x18cm which is just right for giving as a present or bringing out after dinner.  Children obviously love making, and giving (and eating) this.  You can even leave the layer of chocolate to set unadorned then top it with a layer of white chocolate before adding the candy canes.

100g dark (but not too dark or bitter) chocolate

1/2 teaspoon vegetable oil

Pinch of salt

2-3 candy canes broken into small pieces but not total dust

Melt the chocolate along with the oil and salt in a bowl over a pan of hot water.  When melted pour onto a piece of baking parchment (I find it easiest if this is on a small board) and spread to about half a centimetre then sprinkle over the candy canes.  Leave in the fridge to set then tuck in.

The picture you see above was some bark I made for guests at one of my demos – I barely had time to take the photograph before it disappeared.


Tomato, cheese and mustard tart


I can’t remember where this recipe first came from.  I remember my Mother would make it, a classic for Saturday lunches but then I remember a friend of hers, Antoinette, also making it.  Hardly a surprise they were both fans, utterly simply to make and from ingredients you may well have to hand.  I like recipes with a smattering of nostalgia.  Food has moved on so far from what I grew up with and these days we eat a range of cuisines that that child of the ’70’s would barely recognise.  So, amidst the larbs and green curries, the free from cakes and oat milk flat whites I relish coming across those old friends from the past.  Chilli and Spag Bol, Rhubarb crumble and toad in the hole.  All these are classics for a reason and welcome at my table anytime.

So it is with this tart.  Four ingredients, yes just four ingredients and you have a top lunch with a surprisingly satisfying flavour combination.   Sweet tomatoes with savoury cheese atop the tang of mustard and crispy pastry – come on, you know its going to taste good.

Warm with a salad for lunch, perhaps along side some other bits and pieces, soup, good bread, olive etc – that sort of picnic arrangement that always looks such a feast on the table.  It is also good cold and has even made it into the odd packed lunch.  A winner.

Tomato, cheese and mustard tart

As is my way I have tried various additions, slow cooked onions and peppers with the tomatoes, different cheeses etc but whilst delicious, those things are for another day, another tart.  This one shines with the simplicity and harmony of the three toppings.

1/2 a 500g puff pastry

2 tablespoons dijon mustard

3 good size tomatoes, core removed and sliced

100g strong cheddar, grated

Preheat the oven to 200 and put a baking sheet in to heat.  Roll out the pastry on a piece of parchment to a rectangle about the thickness of a pound coin.  Spread with the mustard not quite to the edge and then layer the tomatoes on top.  Season well and then sprinkle over the cheese avoiding the edges.  Transfer the pastry on the parchment onto the hot baking sheet and cook for 20 minutes at 200 and then lower the oven to 180 for a further 10-15 minutes.  After this time the pastry underneath should be bronzed and super crisp.  Allow to sit for five minutes before serving, enough for 2 as it is or 4 alongside other things.


Apple Turnovers (2)

If pushed I think an apple would my choice if only able to eat one fruit ever again.  I love summer berries and would find it particularly difficult to cast aside juicy raspberries or fragrant, almost scented, wild strawberries but an apple would pip them all to the post.  Not only is it hard to beat the juicy, tangy crunch of a perfectly ripe apple but they work so well in all manner of recipes, both savoury but particularly sweet that one might never become bored.  Lacking the glamour of blowsy, vividly coloured summer fruits they are more the sensible prefect of fruits – jolly reliable and a proper all rounder.

Lucky enough to inherit a collection of apple trees when we moved here and having subsequently added to our small orchard, now is the time of year when we are spoilt.  Various eaters and a hugely prolific Bramley mean apples feature on our menu several times a week.  The turnovers in the photograph were an after school treat at the end of last week and a simple form of apple strudel hit the table for pud on Sunday.  A bowl of stewed apples alternate with plums to accompany granola and Greek yogurt for breakfast and an apple crisp is on the cards for supper tonight.

There are apple pies of course and crumbles (try my Apple and Raspberry Crumble, October 2015), elegant apple tarte fines, apple cobblers, crisps and Betty’s.  Grated apple works a treat in a treacle tart to soften that super sweet hit and I like it mixed with mincemeat for a slightly less rich and more tangy pie at Christmas.   My super easy Tarte Tatin (January 2019) enjoys regular outings here as does the Crunchy Apple Pudding (January 2015).  The sharp apple makes a perfect foil to sweet pastry and oaty crumbly toppings;  it melds perfectly with cream whether straight or in the form of ice cream or custard which is why it makes so many appearances as a pudding.  Apples and cinnamon?  A life long love affair and a little tangy apple works amazingly well in cinnamon buns.

So make the most of wonderful apples.  We grow them here and right now you can enjoy them super fresh without having travelled a thousand miles or languished for months in cold storage.   Check out farm stalls and farmers markets for locally grown and unusual varieties – above all make a delicious apple pudding – with all that fruit under the crumble, well its almost health food.

Apple Turnovers

These are a little different to the filo wrapped turnovers I wrote about in Turnovers and leftovers (October 2016).  Not only do these use puff pastry (as that is what I had to hand) but they also combine cooking and eating apples.   This means you get the fluffy Bramley which breaks down to a fluff along with small pieces of the eaters which retain a little bite.  The strudel I mention in the introduction was essentially a large, long turnover using the other half of the pack of puff pastry.  It was eaten before I could take a photograph.

1 large Bramley apple, peeled, cored and cut into small dice

2 eating apples, peeled, cored and cut into small dice

4-5 tablespoons caster sugar plus some extra for sprinkling onto the turnovers

A couple of tablespoons of water

1/2 pack of puff pastry

Milk or a little beaten egg

A little flour

Icing sugar to dust (optional)

Preheat the oven to 200.  Put apples, sugar and water into a large pan and cook gently until the Bramley has broken down and the eaters have lost their crispness.  Taste, you may need a little more sugar and when you are happy with it leave to cool.  Roll out the puff pastry on a lightly floured surface into a rectangle and cut into six squares.  Put a tablespoon of the apple onto one square of pastry, sort of in the right angle, brush the edges with milk or egg wash and fold over to make a triangle pressing the pastry well to seal, use a fork if you like.  Repeat with the other 5 and put onto a parchment lined baking sheet.  Brush a little more milk or egg over the triangles, sprinkle with caster sugar, cut a couple of slits in the pastry and bake for 12-15 minutes until puffed, bronzed and crispy.  Allow to cool a little before dusting with icing sugar if you like.  Makes 6 and depending on the size of the apples used you may have some apple left which would be delicious for breakfast…


Spaghetti with fresh tomatoes and herbs


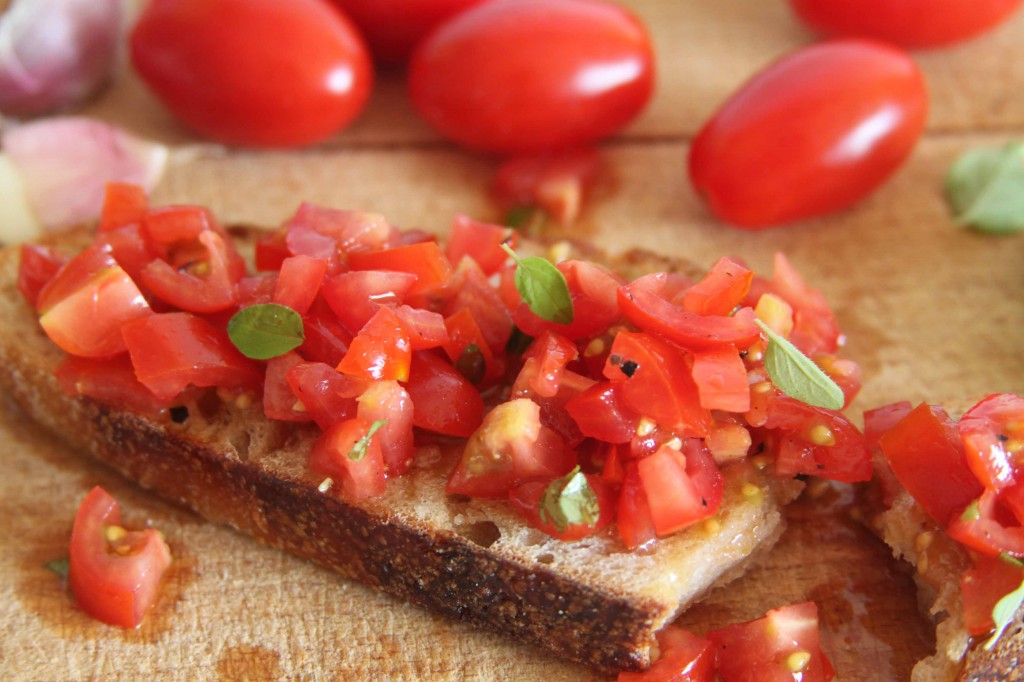
There are piles of glorious, juicy homegrown tomatoes around at the moment.  Months spent basking in the sun has brought them to their peak and now is the time to relish proper full flavoured tomatoes.   We have plate after plate of tomato salad and a week doesn’t go by without us tucking into my Tomato Bruschetta (July 2013) which is, as described, summer on a plate.

This time I have used tomatoes with spaghetti but resisted cooking them so you still get that true fresh tomato flavour.  Combined with masses of fresh herbs, a whisper of garlic and a good glug of grassy olive oil, this is a truly delicious late summer lunch.

Spaghetti with fresh tomatoes and herbs

You can use whichever fresh herbs you have to hand, basil is an obvious winner or course but I also favour fresh marjoram, parsley and chives.  You are relying on the flavour of the tomatoes here so do make sure they are really ripe and juicy and don’t ever keep them in the fridge!

4 medium sized tomatoes

A handful of fresh herbs, chopped (see introduction)

4 tablespoons extra virgin olive oil

1/2 a clove garlic, very finely chopped

150g spaghetti (or pasta of your choice)

Salt and pepper

Put the pasta on to boil in a large pan with a generous pinch of salt.  Halve the tomatoes and squeeze out most of the watery juice and then finely chop and put in a bowl.  Add the herbs, olive oil, garlic, 1/2 a teaspoon of salt and several turns of the pepper mill.  When the pasta is cooked, drain then mix with the tomato mixture.  Taste in case you need a little more salt or olive oil and then serve straight away.  Enough for 2 but easily doubled or trebled.


Pulled Pork

I can’t count how many times I have cooked this – any time of year it seems perfect, particularly when we have a load of friends round.  Very little hands on time, works a dream if you make it ahead of time and is an unbelievably economic way to feed a crowd. Did I forget to mention that it is also downright delicious.   Super tender, long cooked soft pork bathed in a sweet, spicy and tangy barbecue sauce stuffed in a soft bap with my crunchy, zippy fresh Christmas salad, topped with quick pickled onions and hot sauce.  Seriously, what is not to love.

I have made this with a whole shoulder and it made a huge amount, more than enough for 20 with extra for the freezer (a super useful number to have stashed away and it reheats a treat).  I tend to make this more often then with half a shoulder, rather easier to marinade and manoeuvre – last weekend one did 8 children and 6 adults with seconds.  I cooked it fully on Friday, shredded it (easier whilst warm) mixed it with the sauce and then reheated it in the oven on Saturday.  Too easy for words.

The Christmas salad (December 2013) despite its name is also a year round winner, crunchy and tangy, it works so well with the pork, they complement each perfectly.  Quick pickled onions (August 2014) bring a sweet/sour tang to the party and I couldn’t countenance my assembly without a good squirt of sriracha on top.

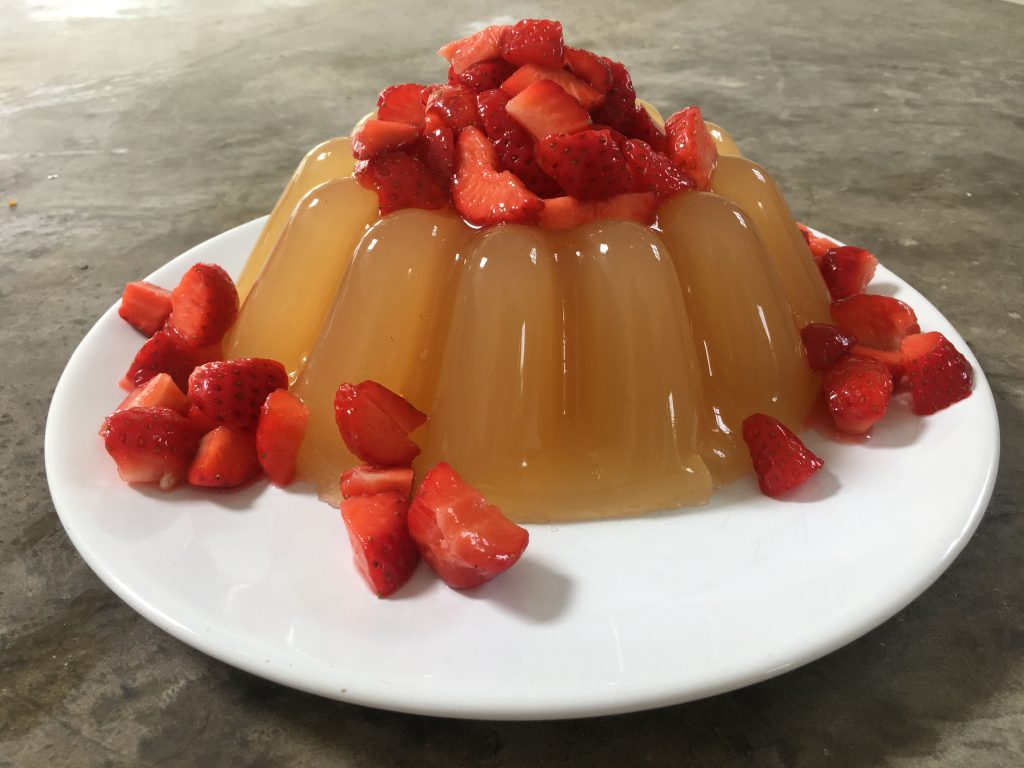
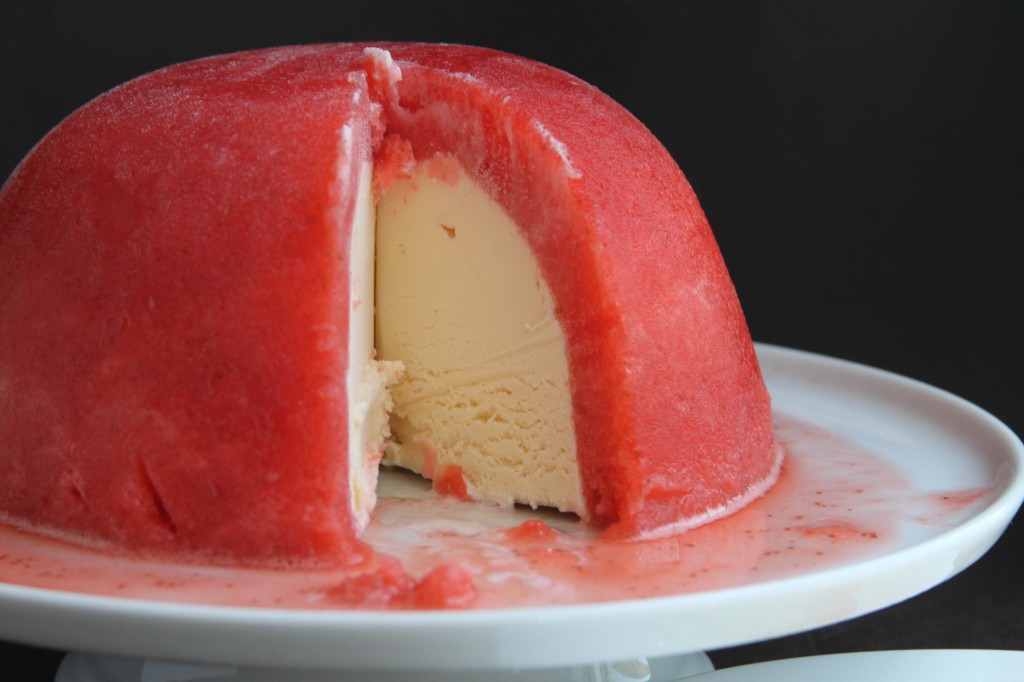
For pudding last weekend I made my son’s favourite, the Giant Strawberry Mivvi (June 2014), see the picture below.  This is a summer treat we look forward to all year and as it needs to be made ahead is another good one for entertaining.

Pulled Pork

1 heaped tablespoon paprika

1 heaped teaspoon smoked paprika

2 teaspoons fine salt

1 heaped teaspoon cumin

1/2 teaspoon cayenne

2 tablespoons soft brown sugar

20 turns of the black pepper mill

Shoulder of pork, around 5/6lbs

50ml cider (or white wine) vinegar

1 bottle good barbecue sauce

Mix the first 7 ingredients together in a bowl then rub into all sides of the pork.  Wrap tightly in cling film and leave in the fridge for at least 4 hours or up to overnight.  When you are ready to cook, preheat the oven to 200 and let the pork come to room temperature.  Put into a baking pan not much bigger than the pork, put the 50ml vinegar and 50ml water in the bottom of the pan (don’t pour it over the pork or it will wash off some of the spices) and cover with foil. Put in the hot oven and immediately turn it down to 160 and cook for 6-7 hours until the meat falls apart when prodded with a fork.   Pour all the cooking liquid into a pan, skim off the fat, pour in the barbecue sauce and simmer gently for 20 minutes until slightly thickened.  Meanwhile remove and discard the layer of fat from the pork, shred the meat and return to the baking pan.  When the sauce is ready pour it over the pork, mix well and serve.

Roasties with Chive Yogurt

Occasionally it’s not so much a new recipe I need, more a hint or reminder of something. After all I have many, many cook books full of recipes but sometimes lack of energy, time or ingredients mean I’m looking for an old favourite rather than a new idea.

So yes, this is a recipe for roast potatoes but how often do you think of roasties aside from Sunday?  These are an absolute winner and get eaten ridiculously quickly whenever I make them.  Not just any old roast potatoes these are canapé potatoes or something else for a mezze type lunch potatoes.   Pimp them up if you wish, a good dusting of paprika or chilli flakes would add pep and a handful of rosemary always works but I like them just like this, with salt and their tangy, chive and yogurt side.

I guess they are a little like potato skins – I know you can make these by baking potatoes and then removing the fluffy contents leaving you with the skins to roast and crisp but I never have.  I do however like the combination of crispy crunchy potatoes with a sour cream and chive style sauce.   This then is my way of doing things – you get the crispy skins but also the fluffy interior and I’ve gone for a yogurt based dip, similar but a little lighter and tangier than the original.

Sometimes I serve these alongside a main course but more often they are offered in their own right – a starter or a grazing treat to go with drinks before lunch or dinner.  A little dish of sriracha alongside offers that heavenly combination of the cold and creamy yogurt with a belt of chilli heat.  It’s not a spanking new fangled recipe, just the re working of an old favourite.

Roasties with Chive Yogurt

This is easily doubled or trebled which I would highly recommend.

500g potatoes, Maris Piper or similar

Olive oil

Salt

150g Greek yogurt

A handful of chives, finely chopped

A small clove of garlic, crushed (optional)

Preheat the oven to 200.  Cut the potatoes into chunks about the size of a large walnut.  Put into a large pan of salted water, bring to the boil and simmer for 10 minutes.  Drain really well, shake briefly in the colander and then put into a large roasting pan, add enough oil to just coat, turning the potatoes well.  Sprinkle with salt and roast near the top of the oven for 40-50 minutes until deeply golden and crunchy at the edges.   Meanwhile mix the yogurt, chives and a good pinch of salt and let down with a little water if you prefer a runnier dip.  Mix in the garlic if you are using.   Serve the potatoes on a large plate with the dip and perhaps some sriracha along side.   Serves 3-4 as a snack.


Teriyaki Chilli Salmon

This recipe really should be called salmon with a rattle around the kitchen cupboard, accurate but less catchy.   It came about ages ago after I’d seen something similar in a magazine but had none of the requisite ingredients.   I use teriyaki because that is what I had originally but light soy sauce will work a treat.  Sweet chilli sauce, ginger and a squeeze of lime are the only other additions along with salmon which I usually have in the freezer.  It defrosts quickly, is reliably bone free (happy children) and quick to cook.

Sweet, salty, hot and sour is nothing new and this combination of tastes are rightly celebrated. You won’t believe what a good foil they are to salmon and frankly supper made this quickly and easily can only be a cause for applause.  Serve on rice or turn some ready cooked noodles in the sauce to heat through – either way clean plates are to be expected.

Teriyaki Chilli Salmon

The coriander and spring onions make a pretty and delicious addition but don’t panic if you find yourself short of one or both of these two – the sauce will more than hold its own without.

2 fillets salmon

2 teaspoons oil

2 tablespoons teriyaki sauce (see intro)

2 tablespoons sweet chilli sauce

1/2 thumb size piece of ginger, peeled and grated

1/2 a lime, juiced

A few sprigs of coriander, roughly chopped

2 spring onions finely sliced

Mix the teriyaki, sweet chilli, grated ginger and the lime juice in a shallow bowl and put the salmon skin side up in this for 5-20 minutes depending on how long you have.  Heat the oil in a small frying pay and add the salmon skin side down.  Cook until the colour has changed half way up the fillets then turn and cook the other for about 5 minutes, adding the marinade for the last minute.  Let it bubble but don’t let it cook and reduce too much or it will become over salty.  Peel the skin off the salmon then serve pouring over the sauce and strewing over the spring onions and coriander if using.  Serves 2.

Spring Lemon Cake

I can’t tell you how many lemons have been squeezed and cakes made here in the name of research.  Lemon drizzles, lemon curds, lemon polentas and of course there is the layered beauty that features here in Lemon Cake and the 1970’s (May 2013) and often graces our table as our Easter Cake*.

I’m happy to eat a lemon based cake any day of the year but in Spring it seems even more appropriate.  That bright yellow zip and zest works perfectly when there is still a nip in the air but green shoots are on show and the hope of sunny days feels well founded.  This then is a cake for teatime, picnics or rainy days, trips to the beach, eating outside or in front of the fire and, of course, for all those school bake sales.

This modest looking little loaf cake has been tried and tested in many incarnations and this  is my favourite.  It couldn’t be easier, is very quick and a doddle if you have children who want to make a cake.  If you don’t have any lemon curd don’t worry it will still be delicious but it’s worth having a jar of good curd in the fridge for such occasions.  You can stick with a crunchy sugar and lemon drizzle if you prefer but this lemony icing is our perfect topping.  Finally, whilst I am a huge fan of butter, it has become quite expensive and Stork or similar works brilliantly here – if its good enough for Mary Berry, its certainly good enough for me!

Spring Lemon Cake

160g butter or Stork (see introduction)

120g caster sugar

Good pinch of salt

2 large eggs

140g self raising flour

1/2 teaspoon baking powder

Zest of one large unwaxed lemon

2 tablespoons milk

2 tablespoons lemon curd (see introduction)

150g icing sugar

Juice of 1/2 – 1 lemon

Preheat the oven to 180 and line a loaf tin.  Cream the butter or Stork and sugar together until light and fluffy, I use a stand mixer for this but a wooden spoon and bowl work a treat too.  Add the eggs one at a time with a spoonful of flour until well incorporated and then add the remaining flour, salt, baking powder, zest and milk.  Finally swirl in the lemon curd leaving a few streaks.  Put the mix into the lined tin and bake for 40 minutes.  Check after 30 and cover with foil if its brown on top before a skewer comes out clean.  Whilst the cake is cooling, mix the icing sugar and lemon juice (add the juice slowly as you may not need it all) and then pour over the top of the cake.  Leave to set and then tuck in.


*Whilst I know a Simnel Cake is the usual Easter offering and I love it, none of my immediate family like fruit cake (also my daughter is allergic to nuts).  Besides, we all know what happens to a cake when only one person likes it……