Parsley, chilli and garlic butter


I’m not sure I dare call this a recipe.  So simple and using the minimum of ingredients yet quick, very useful and punches way above its weight.  The difference between this and the usual blob of butter on potatoes is ridiculous.  A roll of this in the fridge (or freezer) can elevate potatoes, greens or roast vegetables into the star of the show, and therefore dinner.  It makes a superb version of garlic bread, a little more special than a regular garlic and butter loaf and miles better than a shop bought cellophane wrapped pallid brick.

As with so many of my ideas, you can customise at will.  When the wild garlic is around I often use that in place of or in addition to the parsley.  That the wild garlic is usually with us at the same time as the Jersey royals is serendipity itself.  The combination is utterly delicious and will quite happily serve as dinner without embellishment other than a green salad.  It is one of those meals where the vegetables really do take centre stage and deservedly so.  A pan of everyday broccoli or green beans is zhuzzed up no end by a melting pat of this butter.  It looks as if you’ve made loads of effort and rustled up something different and special yet it is the work of minutes.

I also like chives or chervil used in the butter with lemon zest.  A tarragon, chilli and garlic butter melted over grilled or barbecued chicken – supper of dreams.  Make my quick and easy flatbreads (March 2018) and melt one of these butters over them, heaven.

Parsley, chilli and garlic butter

Make as much as you need for one sitting or, as I usually do, make double that amount, you will be surprised how quickly a use for it appears in your head whilst it waits in the fridge.  Below is what I used for the amount of potatoes you see here, 750g.

50g soft butter

A small handful of parsley, chopped

1/2 teaspoon dried chilli flakes

1 large clove of garlic crushed

Sea salt, a generous pinch

Mash all the ingredients together and either dollop straight over hot potatoes or vegetables or roll into a little sausage, wrap in tin foil and keep in the fridge or freezer.


Bread in a pan

You will know I have been making bread for ages but usually bake my regular loaf in a tin or direct on the baking sheet.   My sourdough I cook in an enamel pan with a lid because Elaine from FoodbodSourdough, whose method I use, suggests this and as her method is the absolute business I see no reason to deviate.   Recently though I have started baking my regular white bread in a pan and I love it.

As you all see from the picture, the loaf develops such a fabulous, all round crust and looks incredible.  Couldn’t be easier, just heat the pot as you heat the oven and when both are ready, using oven gloves and extreme caution, put your dough in the pan.  I use a Le Creuset because that is what I have, sometimes they are called a Dutch Oven, and you can also use an earthenware pot with a lid or said enamel pan.  Bear in mind the oven has to get very hot so whatever you use must be able to withstand around 220 degrees.

This method is just so easy – no clattering in the cupboard looking for the right loaf pan, no anxiety about your ball of dough settling into more of a splat on a baking sheet (it’s happened…) just pop it in the pan and look forward to a crusty, beautifully risen loaf.

White Bread in a pan

It you have a stand mixer then this will take literally minutes of your time to rustle up.  Before I got ours though I still made this and happily kneaded it for around 10 minutes.  It is a calming way to spend 10 minutes (come on, it is only 10 minutes!) and you will be rewarded tenfold!

500g strong white bread flour

10g salt

10g dried yeast

1 tablespoon soft butter (optional)

300ml lukewarm water

Put the flour into a large bowl (or the bowl for your mixer) with the salt on one side and the yeast on the other.  Add the butter (if using) and water and bring it all together to form a sticky mess into a dough.  Then using the dough hook put your mixer on for 6-7 minutes or knead by hand for 10.  Sprinkle the inside of the bowl with a little extra flour, put the dough into the bowl, cover with a cloth and leave somewhere warm and draught free for an hour.  After this time you will see your dough has risen so gently punch the air out of it by kneading a couple of times then form it into a ball.  Put it onto a piece of floured baking paper, dust the top with flour and leave to rise for a further hour in a bowl or proving basket if you have one (covered).  Towards the end of this time preheat your oven to 220 and put your le Creuset or pot of choice in the oven to heat at the same time.  When ready to bake, USING OVEN GLOVES remove the pan from the oven, take off the lid and gently lower your dough into it, slash the top a couple of times, replace the lid and cook for 40 minutes by which time it should be perfectly bronzed.   Let it cool on a wire rack and then dig in.


Easter biscuits (with massive disclaimer)

Easter biscuits should contain currants – you know that and I know that but on occasion we have to make adjustments.  Some of my family balk at the idea of any cooked dried fruit.  Christmas cake is a no no, as is Christmas pudding or mince pies.  My festive season could consist of a pud for one if I didn’t take the alternative route and quietly sit and demolish a Christmas cake on my own over the holidays.  That, as ever, is another story.

I remember Easter biscuits as a child and couldn’t countenance this weekend without some.  It would be like forgetting chocolate or eschewing the Easter bunny.  So as ever, I fiddle with the recipe and come up with these.   You could argue that these are simply lemon biscuits but I like to add a pinch of spice and glaze to give them their Easter vibe.  Whatever you wish to call them they are an absolutely cracker with a cup of tea, to give as a present in little bags and perfect to offer to any weekend guests you may be seeing (outside obviously) and in particular for those dried fruit phobes who won’t be tucking into the Hot Cross Buns with me.

This is an easy and reliable biscuit dough that rolls out with cracking or crumbling into a hundred pieces.  At other times of year you can serve these as a crisp biscuit on the side of a posset (Lemon posset, March 2014) or fool (Blackcurrant Fool, February 2019).  Try swapping the lemon for orange zest which is fabulous with melted chocolate trickled randomly over them (forego the glaze in this case).   This amount makes about 30 – 40 depending on the size of your cutter.

Easter Biscuits

Do of course add currants when mixing the dough if my omission concerns you, 50-60g would probably be about right but add more if you like.   I don’t use the mixed spice if making these with orange zest.

100g soft butter

80g caster sugar plus a little extra for sprinkling

A good pinch of salt

Zest of one large or two small lemons

1/4 teaspoon mixed spice

200g plain flour

1 medium egg, separated

Preheat the oven to 200.  Mix the butter, sugar and salt until combined.  Add the zest, spice and egg yolk, mix again then add the flour.  This should come together into a ball but add a drop of milk if you need to.  Roll out on a floured surface and cut out – I use a fluted cutter but it is up to you, egg shapes or bunnies are equally welcome.  Chill if you have time before cooking, it helps retain the cut shape.  Whisk the egg white until frothy and then brush over the biscuits, sprinkle with the extra sugar and bake for 10-12 minutes until golden.  Cool on a wire rack where they will crisp up further.

Loving leftovers (and bashed potatoes with two sauces)

I was recently having one of those chats with a friend about what was for supper that night.  When I said we were having the leftover sauce from a beef stew my friend was truly incredulous.  We were, she suggested, having gravy for dinner.  That I would plonk a salad on the table alongside it only compounded her astonishment and dismay.  It wasn’t as mad or bad as it sounds.

A few days earlier I had cooked a piece of beef very slowly with finely chopped carrots, onions and celery – a sea of red wine and an abundance of herbs, thyme, rosemary, bay and parsley.  After we had eaten the meltingly soft beef (both for Sunday lunch and two lots of leftovers packed lunches) I was left with a lot of the cooking liquor bolstered by the soft vegetables and herbs.  That it had languished in the fridge for two days made only more full of deep, savoury flavour.  I heated it, added a splash of cream and a handful of chopped fresh parsley and served it with spaghetti.  It was glorious, not only delicious but with the added purr-factor of knowing that one piece of beef had gone so far.

I have always cooked like this -eeking out a dish if it can be reincarnated at a later date.  Whilst I try not to keep pointless little pots in the fridge containing one potato I certainly always have a though on the next meal when cooking the current one.  That and trying to come up with something from a seemingly empty fridge is a challenge I have long relished.  So it was earlier this week.  Trying to use everything up before my weekly shop I was faced with various herbs and a pile of potatoes.   A riff on roast vegetables is a regular in my kitchen and with a sauce or two to jazz it up invariably goes down well and lends itself perfectly to leftover lunches the next day although on this occasion there was none left which was both good and bad….

Roast baby potatoes with herbed yogurt and green herb sauce

Here I used the chives I had with the yogurt in a take on the classic chive and sour cream dip – always a winner with potatoes.  The herb sauce here was a combination of mint, coriander and parsley but my Fresh Herb Sauce (July 2013) would be perfect here.  Use whichever soft herbs you have, a combination of just two of those mentioned will still be delicious.  Incidentally I will be offering a mint/parsley version of this sauce alongside our Easter roast lamb this weekend.

New or baby potatoes, as many as you have, I used about 600g

A handful of parsley

A handful of mint

A handful of coriander

Juice of half a lemon

A splash of white wine vinegar

1 teaspoon sugar

4 tablespoons olive oil plus 1 more for the potatoes

Approx 150ml yogurt

A handle of chives, finely chopped

Preheat the oven to 200.  Boil the potatoes in salted water for just 10 minutes until a pointed knife will pierce one with little resistance.  Drain the potatoes and put into a roasting tin, roll around with a tablespoon of oil and a sprinkling of salt. Push down on each potato to just break the skin and squash them a little.  Roast for around 20 minutes until bronzed and crisping at the edges.  Meanwhile mix the yogurt and chives in a bowl with a splash of water to loosen and a pinch of salt.  Put the parsley, mint, coriander, lemon juice, vinegar, sugar, 4 tablespoons of oil plus some salt into a jug and using a stick blender whizz until combined into a sauce.  Serve the potatoes topped with both sauces.  This was was a really good supper for 3 along with a green salad but you could always have it as your potatoes alongside a roast chicken or anything really.


Happy Christmas

In part one I made much of planning ahead, list making and multi-tasking ingredients.  This means you can knock up some cracker dishes from your leftovers and also have some good ideas for what you want to cook and eat.  However, I’m also a fan of having some fully made suppers in the freezer so when you can’t face another minute in the kitchen you know there will be something to curl up on the sofa with.

I will try and find the time to make a soup, chilli and stew over the week.  Whilst none of these are ground breaking, they are hugely popular chez May and once defrosted will take little effort on my part.   If you have the energy to jazz these up, a garlic bread with one of those baguettes from the freezer would go down a treat, or maybe some of my quick flatbreads or the homemade tortilla chips mentioned in the chilli recipe (Girls’ Night In, February 2014) – and don’t worry, I am not mad enough to suggest MAKING tortillas, this is just a way of jazzing up bought tortillas into crunchy chips.

If you have some extra sausages why not try the Penne con Salsiccia (March 2015) it takes a handful of ingredients, minutes to make and is so cosy and comforting.  If you have some greens that need using up and some jaded tastebuds requiring a wake up try the greens with garlic and soy (October 2017) – I could happily have a bowl of these with rice for lunch.  You know the lunches and suppers your family love but it is the little extras such as the garlic bread or crunchy seeds strewn over a salad that lift meals from the ordinary to the special Christmas meals – and we all need a bit of special this year.


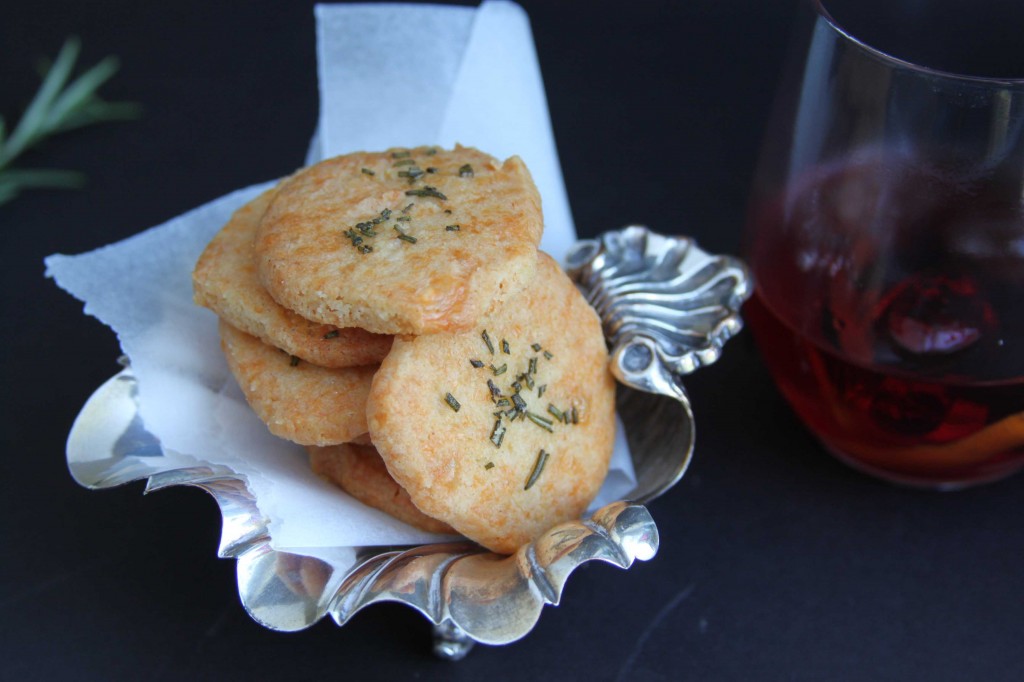
Talking of which despite not being able to party, either Christmas drinks or a full blown New Year knees up, I will be adding sparkle and glitter to our menus where I can.  Treats with drinks in front of the fire is something I love – gougeres (November 2016) and cheese sables with rosemary salt (December 2013) going into the freezer today in readiness.  My cherries have been soaking for sometime and I can’t wait to tuck into my spiced cherries in bacon (November 2013), my ultimate Christmas canapé.  Along with a Sloe Vespa, prosecco with sloe gin, I shall feel suitably and happily ready for Christmas.

For some last minute presents, anything edible always goes down well.  The effort made is much appreciated and it’s also something fun to do with your children.  We always make loads of spicy seeds (November 2018) to put in little bags with a festive bow.  The Christmas biscotti (November 2012) and grissini with rosemary (May 2015) use mainly store cupboard ingredients so can be made on a whim.

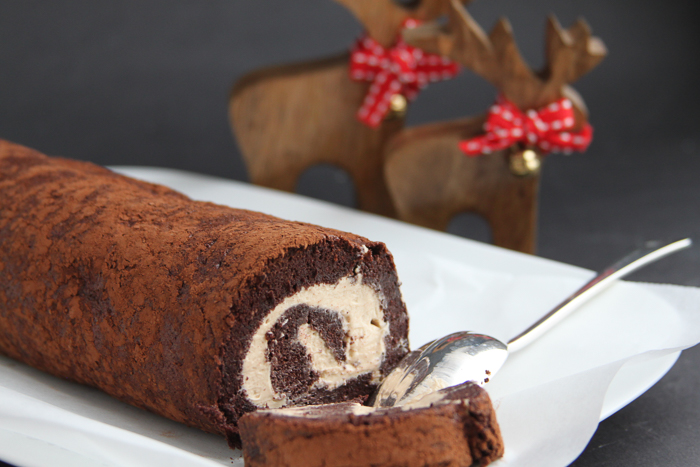
This chocolate pudding cake below (December 2012) can be made ahead and frozen and it will fill you with joy to know you have this waiting to make an appearance, particularly when you have had enough of all the dried fruit based puds we immerse ourselves in at this time of year.

Food has the ability to raise spirits and cheer us all – I hope that some of these suggestions may find their way to your Christmas table and help you enjoy the best Christmas possible.   Wishing you all a very Happy Christmas.

My Christmas larder and get ahead tips, part 1


There is little more pleasing than a well stocked larder and fridge.  That feeling of being able to hunker down and settle into the lazy rhythm of the holidays without visiting the shops is always comforting and this year, more than ever, it feels essential.  Whilst I love soup and cold ham with cheese for lunch as much as the next person, I don’t want to feel I am coasting from meal to meal of remnants, bits fished out of the fridge.  There is so much more to be done with leftovers and it’s not often I have both half a cold turkey to hand and the time to enjoy creating dishes out of it.  However, in order to achieve this without teetering on the brink of insanity and panic for ten days, I need to be organised.

Regular readers will know I am super keen on getting ahead, my devotion to planning is well known and much discussed.   Making what I can and putting it in the freezer, stocking up on treats and rustling up presents.   In previous years I have posted plenty of get ahead suggestions and I list below which months to check them out in the archives.  Suffice it to say I will be utilising these tips to get my ready-to-roast potatoes into the freezer this week along with pigs in blankets, stuffing, bread sauce, gravy and cranberry sauce – all of which come to no harm after a couple of weeks languishing in the icy depths.  Moreover, the relief if not smug glow that you will feel on knowing all these dishes are already prepared for the big day is enormous.

It is not just Christmas Day that I want to prepare for nor simply the freezer that is your friend this month.  Along with my larder planning and fridge filling I like to list the menus/recipes I have in mind for other days, where vegetables can multi task and of course, delicious ideas for those inevitable leftovers.

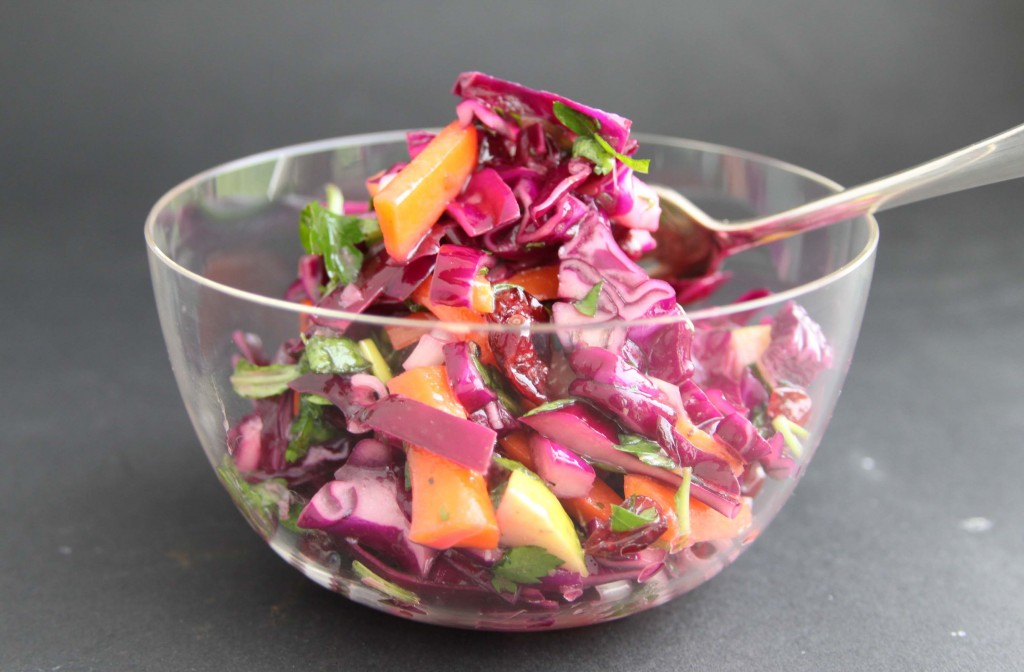
For instance, I couldn’t be without my Christmas salad (December 2013) as the perfect accompaniment to cold turkey, goose or ham.  It is full of fresh crunch and vibrant flavour, just the job for palates feeling a little jaded or simply tired of rich winter food.  That it’s made from vegetables that last beautifully – red cabbage, carrots, apples – is a bonus.  However, once I’ve got my mitts on these ingredients I want to know there are other recipes I can use them for.   We always have red cabbage with our Christmas Eve ham so that is the other half of this particular cannonball taken care of, why not try the Firecracker Red Cabbage (November 2013) or the gloriously crisp and tangy Red Cabbage, Radish and Herb Salad (January 2020).  Apples I turn to for an easy Tarte Tatin (January 2019) as a change from the ubiquitous dried fruits as well as cooking until soft to accompany yogurt and Granola (January 2013) or porridge for breakfast.   Carrots are a trusty fall back whether roasted to accompany Turkey, in my Thai-ish salad (November 2015) or New Slaw (May 2016) to accompany those turkey sandwiches and let’s not forget Beetroot and Carrot cake (which can be just carrot if that’s what you have) with lime frosting which is a delicious alternative to those not keen on Christmas cake (everyone I live with).  So, that’s already four ingredients multi-tasking to the max.

Do you see what I mean?  A little bit of planning and list making will make life so much easier.  Rather than gazing at that pile of cold turkey hoping for inspiration simply check out your ideas list or use mine below.  Choose some of what you want to eat over the next couple of weeks and you can adjust your shopping list accordingly.

By the way, leftover turkey can, of course, mean curry but it can also mean a riff on Bang Bang Chicken, Coronation Chicken (imagine this in those baguettes you’ve got in the freezer….) a fabulously zingy Vietnamese salad along with some of the crunchy veg mentioned above, a gratin or pie of course with ham and leeks. Use cooked turkey instead of the chicken in my Camp Fajitas (July 2016) which work so well in the Quick and Easy flatbreads (March 2018).

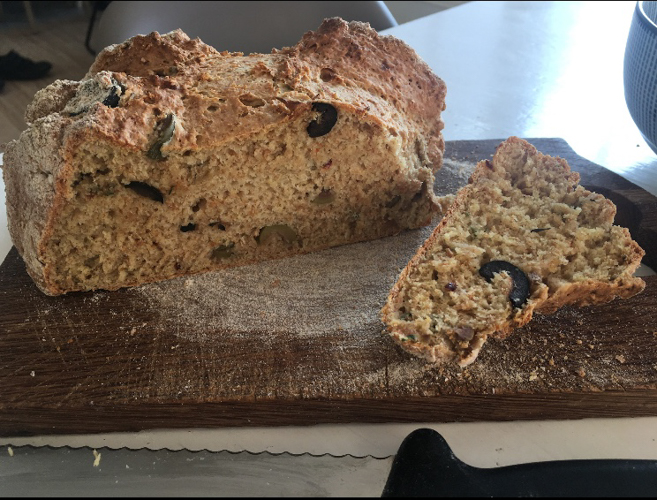
Bread freezes well and means you are prepared for sandwiches or soup (a happy finale for tired vegetables).  Frozen naan always lifts a curry, sourdough makes a cracking bruschetta or rarebit (for some of that leftover cheese).  Warm baguettes elevate sandwiches or soup and can made into a quick herby, garlic bread – incidentally a pinch of dried chilli flakes along with the garlic here is top notch.  If you’ve got left over cheese why not put it to good use in a some Cheese and Chive bread, a gooey, savoury treat everyone will love (December 2014).  And don’t forget soda bread, made start to finish inside an hour, no rising, Seedy soda bread, which can be regular soda bread without the seeds (April 2013) or jazz it up to be Olive, thyme and chilli soda bread (December 2018).

Frozen prawns or fish for a curry (November 2012) or Chermoula prawns (April 2020) when you want a break from the leftovers or mix prawns with a herby creme fraiche/mayonnaise to pile onto toasted sourdough for an easy canapé or snack.

A bag of frozen berries take minutes to transform into a bright and tangy smoothie or puree for cocktails (Raspberry Daiquiri, May 2014 – and we could all do with one of these to toast this year out…).  Or treat yourself to that Ivy classic of frozen berries topped with white chocolate sauce – recipes online – or warm berries up with or without a splash of booze to have over ice cream along the lines of Cherries Jubilee.  Frozen blackcurrants make a wonderfully tangy mousse (January 2017). Oh and please don’t forget my Larder Pudding (March 2015) which uses frozen raspberries but any frozen berries would work a treat or use golden syrup instead for possibly the best pudding in the world.

Make spicy seeds (November 2018) to nibble with drinks, sprinkle over salads,  soups or gratins – I am making lots of these to put into little bags for hampers I am sending out along with Christmas Biscotti (November 2012).  More of edible presents in part 2.

There are lots of ideas for canapés and party food on these pages and although this year we can’t plan parties, we can certainly treat those in our families and bubbles to some Christmas and New Year glitter and sparkle.  Ideas for these plus essentials not to be without in part 2.

I could go on.  I hope that some of these might help along with the make ahead tips you will find in the two November 2013, November 2016 and November 2019 posts.  In the last is the recipe for Chocolate and Peppermint Bark which neither I, nor my children, would want to be without.


Tarte Flambée

If you are not familiar with a Tarte Flambée then I would say you are in for a very special treat.  This glorious tart marries smoky bacon with creme fraiche and sweet, slow cooked onions in spectacular fashion.  Originally from Alsace, it brings to mind the Alps, and would make a cracking lunch after a morning on the slopes.  Fortunately however, you don’t have to go skiing to enjoy this.

I first came across this years ago when I bought a little one from my local Sainsburys in Fulham and both G and I loved it.  So much in fact that we started making our own from scratch as a regular Sunday evening supper.  Now I might make it for lunch with a big green salad, but more often will serve one up before supper when we are having a drink and a chat.

A combination of the salty savoury bacon or pancetta and creme fraiche on the crispy base makes this a consistent success and it is usually gone in minutes (see last picture).  This base is essentially a riff on my Quick and Easy Flatbreads (March 2018) just flour and yogurt with a splash of oil – it couldn’t be easier and works so well cooked in my slightly unorthodox fashion.

Two little asides – if you want to use up the creme fraiche and pancetta then look no further than my Savoy Cabbage with Pancetta and Creme Fraiche (February 2018) and should you wish to serve this to vegetarian guests I would happily swap the bacon for mushrooms cooked alongside the onions – stick with the thyme, it works a treat with mushrooms and then continue with the rest of the recipe.

Tarte Flambée

I sometimes buy those little packs of cubetti di pancetta which usually come in weights of 100-125 grams which is perfect.  Alternatively chop some rashers of smoked bacon or pancetta.  I have also, in times of need, used a ball of mozzarella in place of the gruyere – you get more melty, pizza like cheese but less of the Alpine vibe that I love but it works if that is what you have.

125g plain flour, plus a little extra for rolling

115g yogurt

Pinch of salt

2 tablespoons olive oil

1 large onion, peeled and roughly chopped

100ml creme fraiche

100-120g smoked bacon or pancetta in small pieces (see intro)

100g gruyere, grated

1 teaspoon thyme leaves

Preheat the oven to 210 and put a flat baking sheet in to preheat.  Using a large frying pan, mine measures 30cm, cook the onions in one tablespoon of the olive oil and a pinch of salt for around 20 minutes until soft but not coloured.  Put the other tablespoon of oil in a bowl along with the flour, yogurt and a pinch of salt and mix until it comes together in a ball.   Using a little extra flour roll out the dough until approx 30cm in diameter.  Tip the softened onions onto a plate and then transfer the rolled out dough into the frying pan – don’t bother washing it, that little oil left will aid crisping the base.   With the pan on a medium heat spread the creme fraiche over the dough almost to the edge, sprinkle over the cooked onion and thyme leaves followed by the bacon.  Finally sprinkle over the grated cheese.  Carefully check the underside, it should be starting to colour and feel dry.  Once you have finished arranging the topping and are happy that the bottom is cooking, slide the tart onto the hot baking sheet and cook in the oven for 10-15 minutes until golden and bubbling.  Leave to cool just long enough that you won’t burn yourself then cut into slices or small squares, I can’t tell you how good this is…..

Last of the summer fruit (blackberry and apple) cake

I have made this cake twice in a week – once with the last of the raspberries and an apple from the garden and then again with wild blackberries and another apple.  A real foragers cake.  This sort of cooking gives me immense pleasure – I can always rustle up some sort of tea time treat and my ginger cake (July 20103) is a regular go-to as the required ingredients are usually on hand.   This cake is even more satisfying, a few bits and pieces found in the garden are giving star billing, a glorious last hurrah if you will.

A light vanilla sponge studded with flavour bombs of fruit, their crimson colour seeping into the yellow cake like a sunset.  The raspberries I used were supplemented with a few blackcurrants from the freezer and I will use these again soon – their bright and vibrant sharp-sweet flavour the perfect foil to the sweet sponge and a million miles better than the oft used blueberries.

Next on the bake list is my Beetroot and Carrot cake (February 2016) – an absolute delight and a great way to use up some of the late summer root veg (see bottom picture).

Blackberry and Apple Cake

Use what you have – blackberries are an obvious choice at the moment.   When all the summer fruit is done you could use some frozen berries as I did with the extra blackcurrants.  I add the extra flour to balance the extra wetness from the soft fruit and apple.  This isn’t too sweet a cake which I love but it could certainly take a drizzle of the lemon variety if you wanted, see my Spring Lemon Cake (March 2019).

160g butter or Stork

130g caster sugar

Good pinch of salt

2 large eggs

140g self raising flour plus two tablespoons

1/2 teaspoon baking powder

1/2 teaspoon vanilla extract

A good handful of blackberries or other fruit (see intro)

I medium apple grated, I don’t bother to peel it

Icing sugar to dust (optional)

Preheat the oven to 180 and line a loaf tin.  Cream the butter or Stork and sugar together until light and fluffy, I use a stand mixer for this but a wooden spoon and bowl work a treat too.  Add the eggs one at a time with each with the extra spoonfuls of flour until well incorporated and then add the remaining flour, salt, baking powder, vanilla and grated apple.  Finally gentle mix in the blackberries.  Put the mix into the lined tin and bake for 40-50 minutes.  Check after 40 and cover with foil if it is brown on top before a skewer comes out clean.   Cool on a rack for 10 minutes before removing from the tin.  Dust with icing sugar if you like or add a glaze (see intro).

The sharp eyed will notice that the cake in the picture above is the raspberry version because I caught a picture of this, the blackberry and apple one went too fast…..


Chermoula Cauliflower

This is essentially a riff on my Chermoula Prawns (April 2020) but with cauliflower.  As such you probably don’t need a recipe but I wanted to draw your attention to it because I make it so much (for that also read eat it and love it so much).   The cauliflower gets those delectable crispy bronzed edges in the oven and these combined with the powerhouse of flavour that is chermoula means this is an absolute winner.   We’ll have this for lunch, sometimes on its own but more often with an assembly of other dishes – this mezze/tapas type eating being a favourite of ours and a good way to eat more veg.   It also works brilliantly in packed lunches which now feature in my weekly cook as we are back at school and work.   You can cut the cauliflower into trendy steaks if you want but I usually do florets – that it is also vegetarian/vegan is simply a bonus.

Incidentally I cook fish a lot with this chermoula as well – very much in the same way as the  chermoula prawns and it perks up frozen fish, which I found myself using during lockdown, a treat.   This makes a supper that feels both light and clean but full of flavour and hugely satisfying.  Whatever you cook it with I encourage you to whizz up a batch – bright with herbs and citrus, underlying spice and a zap of heat – it really is good.

Chermoula Cauliflower

When I came up with the chermoula prawns during lockdown I had to use ground cumin and coriander (see below) as this is all we had.  Now I have a supply of the whole seeds I tend to use these, partly because I love the smell when bashing them in the mortar but also because their flavour is more vibrant.  If you choose the whole seeds simply warm them in a dry pan until fragrant then crush with a pestle and mortar and proceed.

2 tablespoons oil

1 onion finely chopped

3 cloves garlic, chopped

Small bunch mint, roughly chopped

Small bunch coriander, roughly chopped plus a bit extra to serve

1 tablespoon ground cumin (or whole seeds, see intro)

1 tablespoon ground coriander (or whole seeds, see intro)

2 teaspoons paprika

1/4 teaspoon cayenne pepper

Juice of 2 lemons (use limes if that is what you have)

1/2 teaspoon sea salt

Half a tin of chopped tomatoes or 2 fresh tomatoes chopped or a handful of cherry tomatoes (use the whole tin or tomatoes/more fresh tomatoes if you want this saucy).

I cauliflower, separated into small florets

Preheat the oven to 200.  Put the cauliflower onto a large baking pan, turn in one of the tablespoons of oil, sprinkle with salt and cook for 20 minutes or so until just soft and beginning to brown on the edges.  Heat the other tablespoon of oil in a large frying pan and cook the onion gently until soft but not coloured.  Whizz the remaining ingredients apart from the tomatoes in a small food processor, with a hand held blender or chop by hand.   Mix a tablespoon of the paste with the cauliflower and return to the oven for 5-10 minutes and add the remaining paste to the onions along with the tomatoes and a good splash of water.  Once the cauliflower has had its additional time either add to the sauce or dollop the sauce over and serve sprinkled with the extra coriander.  This would serve 2 with rice and was actually enough for the 4 of us as a side for lunch.


Crispy spiced chickpeas (for snacks or for salads)

I relish that end of the day wind down and particularly at this time of year try to persuade my family to assemble outside if it’s warm, to catch up and enjoy a drink.  Often this is only possible at weekends and even then one or other child is often out but still, it is something I look forward to whether we are in the garden or installed in front of a cosy fire.

With a drink I always, rather greedily, look forward to the accompanying snacks.  Although I won’t turn down a crisp, there are other things I turn to which seem more delicious and rather less greasy.  The most important ingredient though is a touch of salt which somehow defines ‘snacks with drinks’.  It can be as simple as a bowl of olives, briny and savoury or a hunk of parmesan cut into gritty shards – unbelievably moreish and of course ridiculously simple.  The spicy seeds which you will find here (November 2018) make a regular outing and these savoury, crunchy chickpeas have also become a fixture over the years.  You can customise them with whichever spices you favour, I tend to fall back on this classic combination and then add as much or little chilli as I think will go down well.  Sometimes I will make a batch of these or the spicy seeds and put into little bags or jars as presents, none turned down yet.  The chickpeas are fabulous on a salad, we tucked into one this week with masses of grilled courgettes, roast cherry tomatoes and squeaky green beans as this is what needed using up from the garden – it was a stellar combination, though I say it myself.

Chick peas are an absolute star to keep in the store cupboard, an essential in my book.  You can add them to a stew like the chorizo one (September 2013) cook them with potatoes (May 2014) or chicken (March 2015) and of course make an earthy, garlicky hummus.  Or simply open a can and make these.

Crispy spiced chickpeas

Use whichever spices you feel like and you can use ground ones if that is what’s available.  I like to use seeds because the flavour seems more vibrant and of course you get the added bits of crunchy seed alongside the chickpeas which are delicious.

1 tin of chickpeas, drained

1 tablespoon olive oil

Sea salt

1/2 tablespoon coriander seeds

1/2 tablespoon cumin seeds

Dried chilli flakes (optional)

Preheat the oven to 200 and line a baking tray with parchment.  Tip the drained chickpeas onto a tea towel, fold it over to enclose them and gently roll the chickpeas around.  This will both dry them and remove the skins which you can discard.  Once the chickpeas are dry put them into the lined tin and add the olive oil.  Turn until coated then cook for 15 minutes.  Meanwhile heat the spices in a dry frying pan until fragrant and popping then grind in a mortar.  After the 15 minutes are up remove the chickpeas from the oven, add the spices and a good pinch of salt, mix well then return to the oven for a further 5-7 minutes until just beginning to bronze.  Leave to cool then tuck in or scatter over a salad.